Building Data Portal
Building Owner User Guide
Table of Contents
4. Building Data Portal Pages and Navigation
4.2.3.1 Create a Usage Request
4.2.4.2.1 Tenant Verification Process
The Building Data Portal (also known as BDP) was developed to retrieve aggregate energy usage data for single-tenant or multi-tenant commercial, residential, and industrial buildings. The BDP gives building managers the ability to enter a portfolio of buildings; verify the tenants that reside in the buildings; create one time and recurring energy usage data requests; view building energy usage data per month; and transmit energy usage data to ENERGY STAR Portfolio Manager to determine energy performance ratings.
This guide provides an overview of the features and steps for Building Owners using this application.
Below are high-level sequential steps a user must take to view and download usage data and connect to ENERGY STAR Portfolio Manager:
- Submit an enrollment form (Section 2.1)
- Create your building(s) (Section 3.1)
- Create a usage request (Section 4.2.3.1)
- Provide tenant consent (if necessary) (Section: 4.2.4.2)
- Verify tenants (Section: 4.2.4.2.1)
- View and download usage data (Section: 4.3)
ENERGY STAR Portfolio Manager:
Instructions for connecting your BDP building to ENERGY STAR Portfolio Manager can be found in the ENERGY STAR Connection Guide.
This section covers initial access to the Building Data Portal and logging into the tool.
Please contact the Building Data Portal team at support@energyusage.rienergy.com to obtain an enrollment form and use our secure file transfer portal to submit your form(s):
- Select "Upload" to attach your form (JPG, PDF, PNG, DOC, XLSX, and TIFF formats accepted).
- Type your email address in the "From" field.
- Select "Building Data Portal" from the dropdown menu or type support@energyusage.rienergy.com in the "To" field.
- Enter "Building Data Portal Enrollment" in the "Subject" field.
- Include your full legal name and building address in the "Message" field.
- Select "Drop Files Off" to share your documents with Rhode Island Energy's Building Data Portal Support Team. We will review your enrollment form and create your account.
You will receive an email inviting you to create a password for your account once your enrollment form has been reviewed.
2.2 Logging into Building Data Portal
To log on:
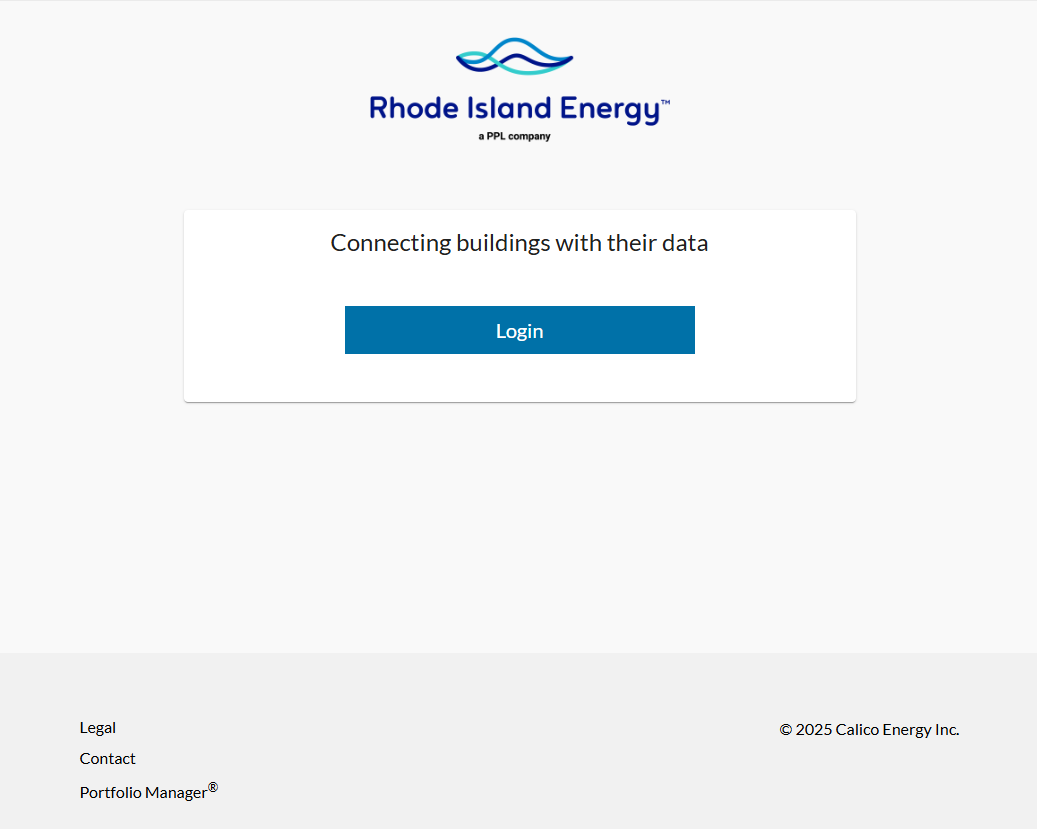
- Launch the portal from https://www.energyusage.rienergy.com
- Click the Login button.
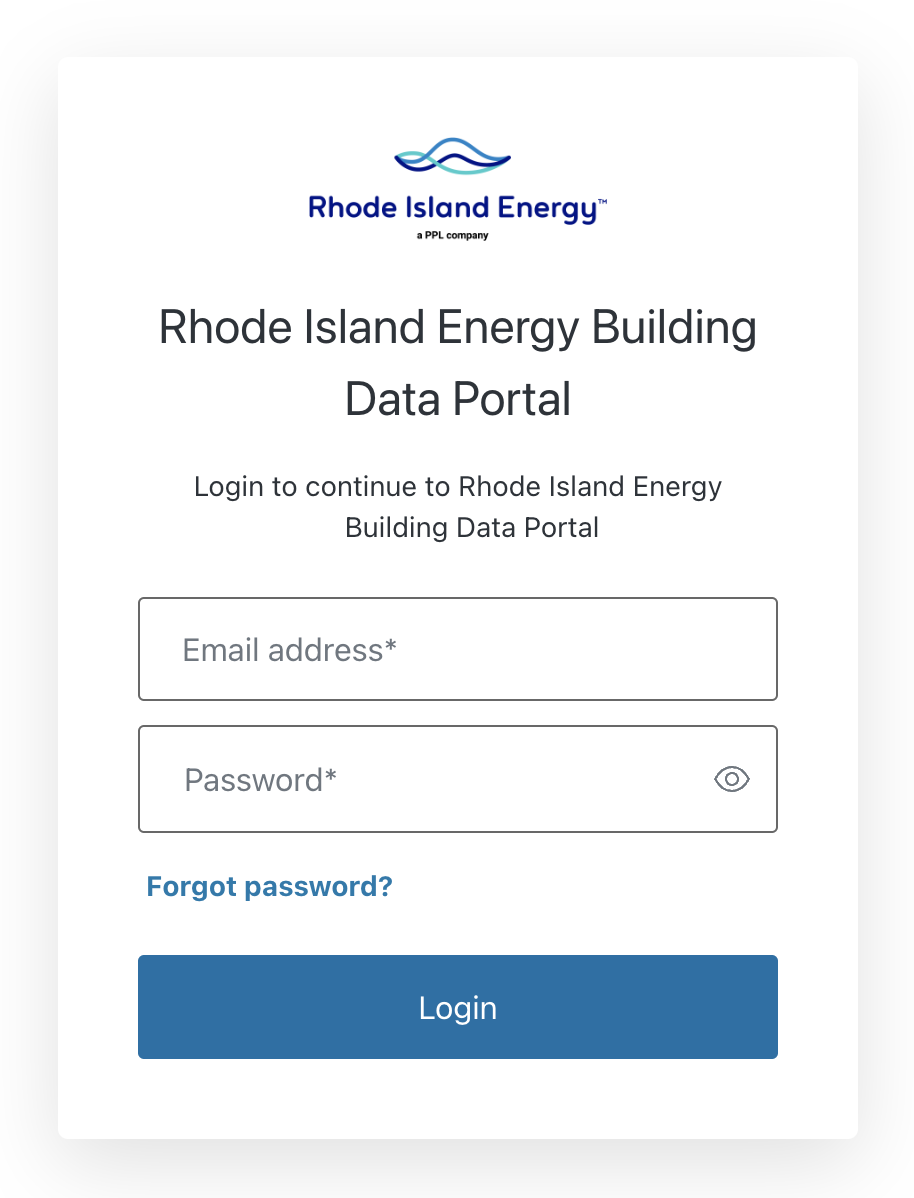
- Enter your e-mail address and password into the fields. Click the Login button.
- The first time you login, you will be asked to accept Terms and Conditions, fill out profile information, and create your first building.
- You may choose to fill out profile information later by clicking the Logout and complete later button. Your profile information can also be updated at any time. See section 5.1.
- The BDP Dashboard page appears, this is where your buildings will be displayed once you create them.
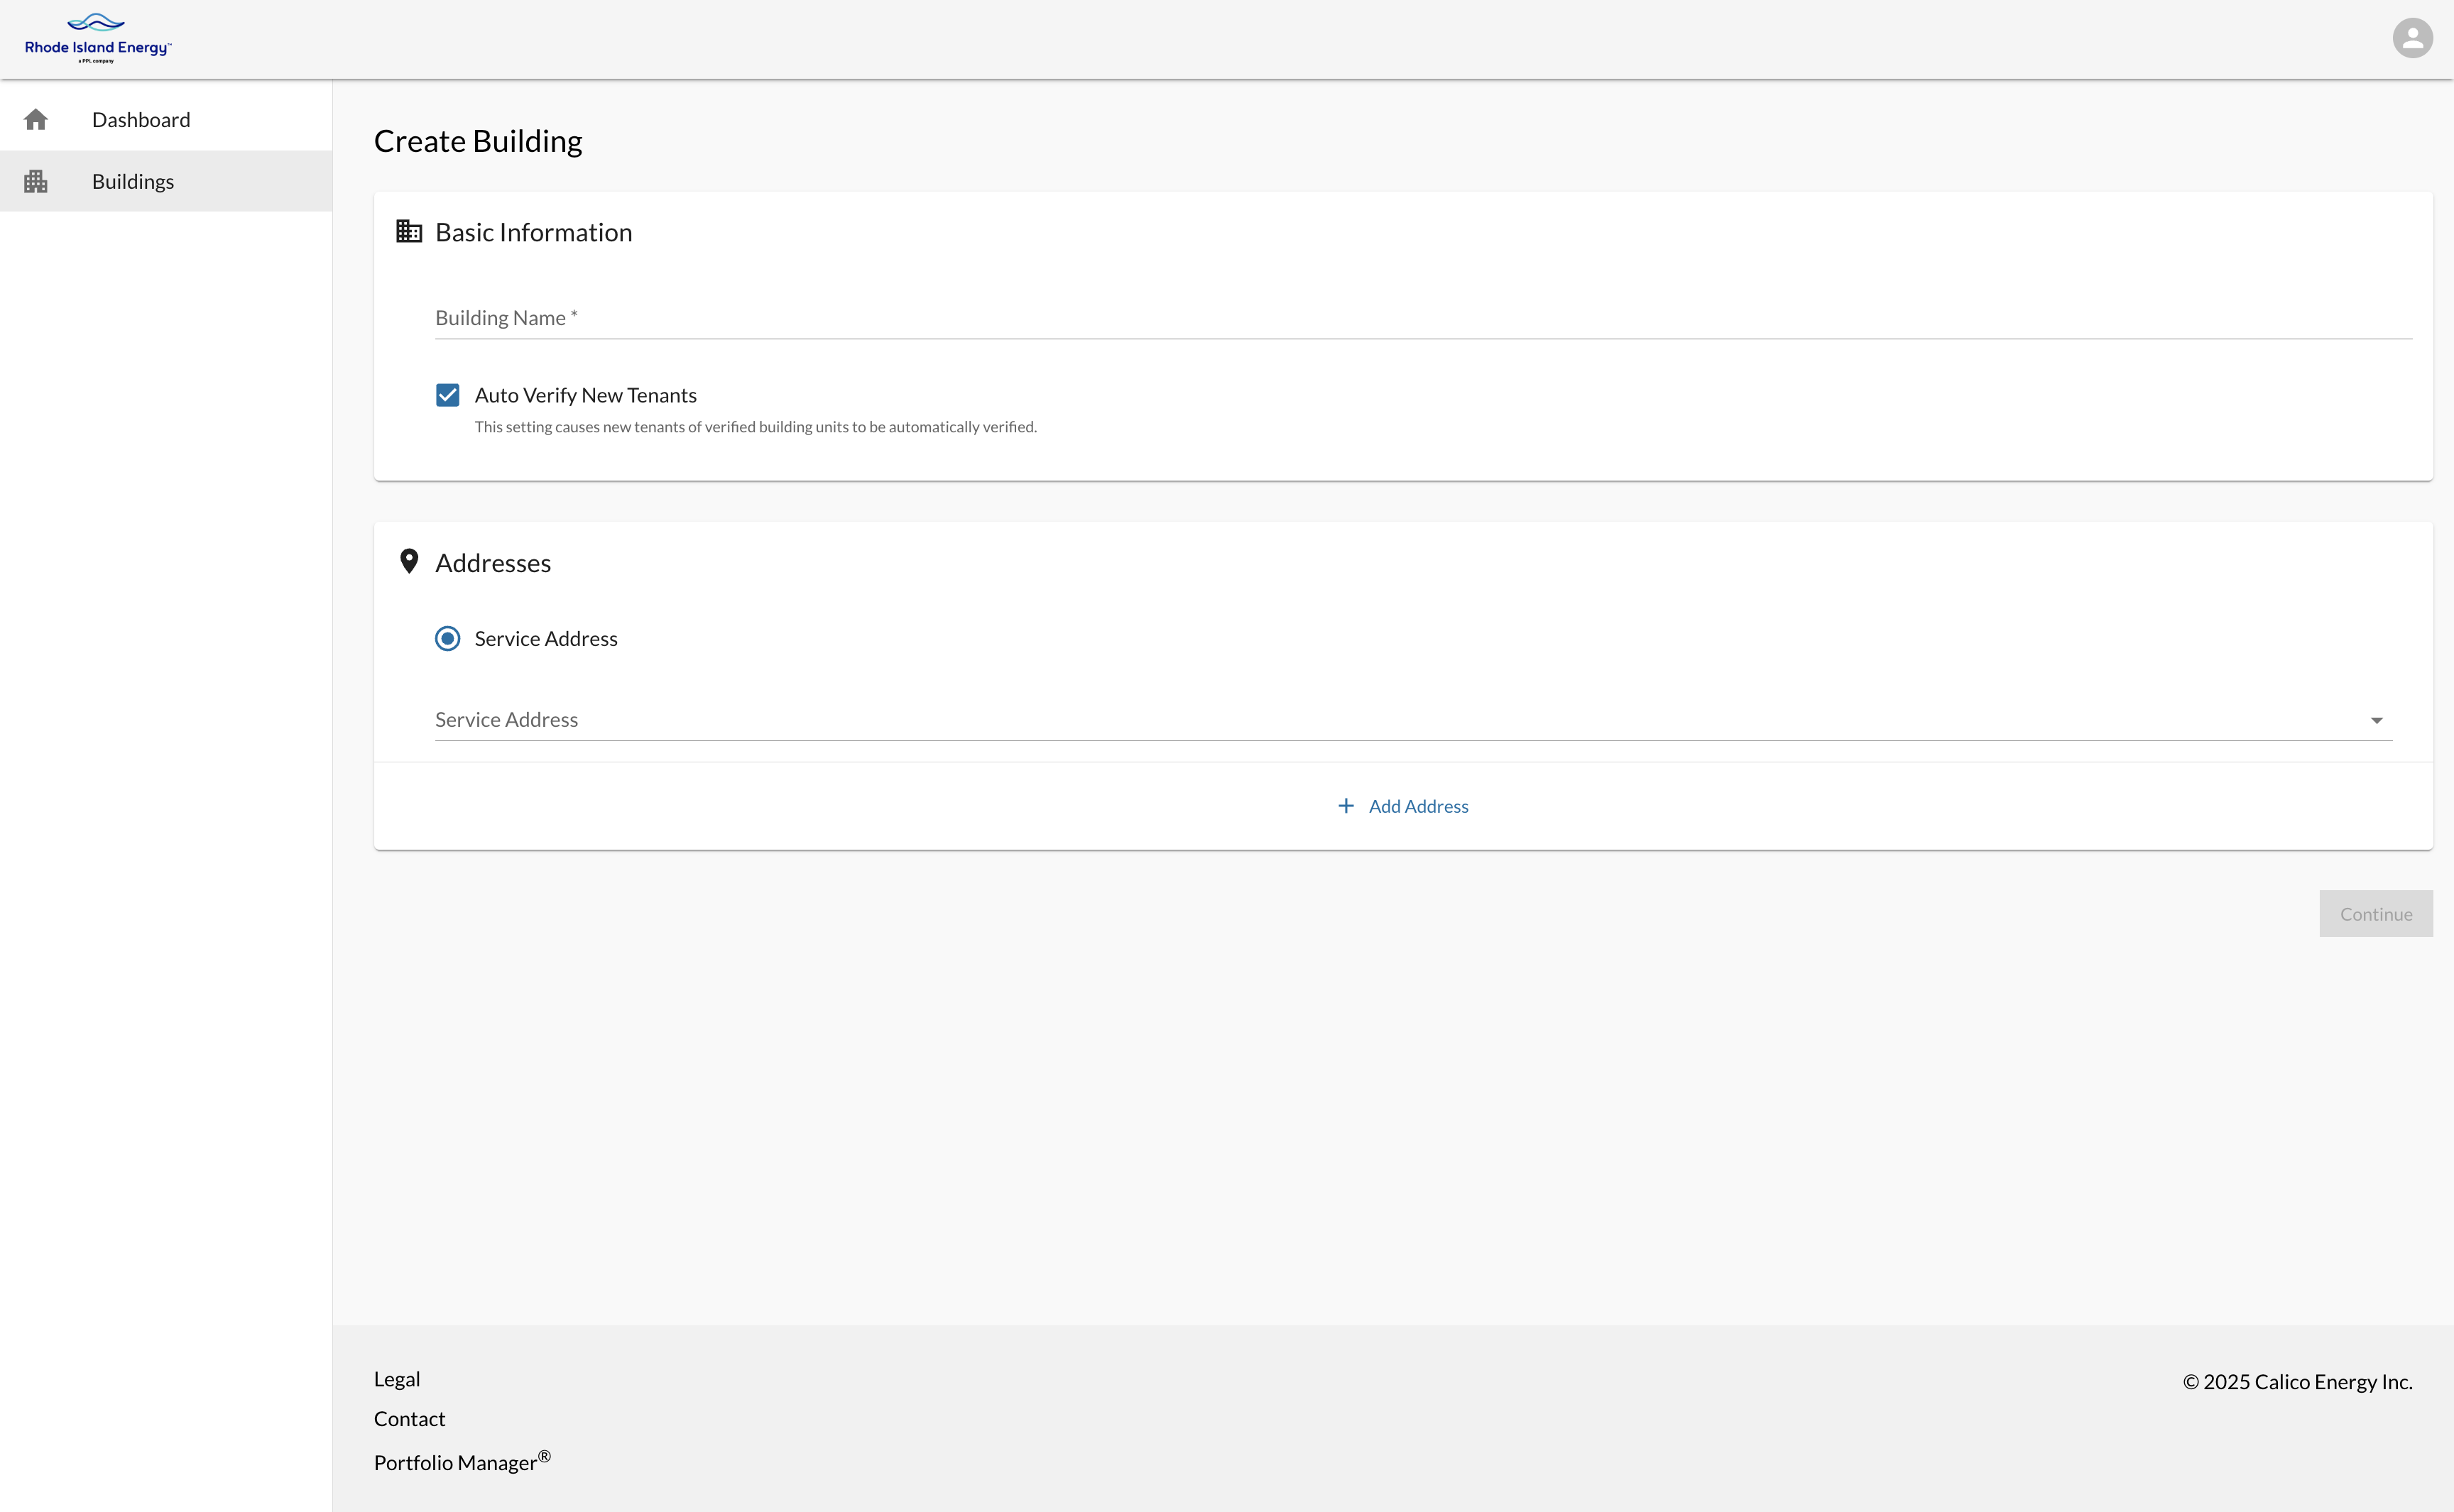
To create a building:
- From the Dashboard, click the Create Building button, or from the Buildings page, click + Create Building.
- Enter in the required fields.
- If your building does not have a name, we recommend using line 1 of its street address.
- In the Address field, begin typing the service address. A drop down should appear with addresses that match the service address.
- You may see many different service addresses in the drop down. Carefully review the addresses in the drop down and choose the option that matches your service address. Be sure the City, State and Zip Code matches what is on the utility bill. Please note that there may be multiple matches with varying zip codes due to the +4 code. We recommend adding all variations of the address.
- If you are having issues finding the service address, make sure any street suffixes are abbreviated. For example; instead of Terrace try typing Ter or instead of Circle try typing Cir.
- You may see many different service addresses in the drop down. Carefully review the addresses in the drop down and choose the option that matches your service address. Be sure the City, State and Zip Code matches what is on the utility bill. Please note that there may be multiple matches with varying zip codes due to the +4 code. We recommend adding all variations of the address.
- If there are any additional addresses associated with the building, click Add Address. Once all details of your building have been provided, click Continue.
- The next screen will validate your building’s address(es) and an alternative address may be suggested. Please carefully review any suggested addresses for accuracy. If the address(es) listed is correct, click Accept & Save Building. Otherwise, click Modify Building Information.
- You will be taken immediately to your new building’s Overview page.

If a building already exists within the Building Data Portal, you may see an error stating such. The Building Data Portal does not allow duplicate buildings. Please reach out to Support at support@energyusage.rienergy.com for assistance. You may be required to provide a letter of authorization for the building to be transferred to your account.
To edit a building:
- From the building’s Overview tab, click the Edit Building button.
- Make any desired changes, then click Continue.
Please note: Adding additional addresses or making changes to existing addresses will require the application to validate all addresses. Please carefully review any suggested addresses for accuracy.
4. Building Data Portal Pages and Navigation
This section covers the BDP pages and navigation through the various areas of the tool.
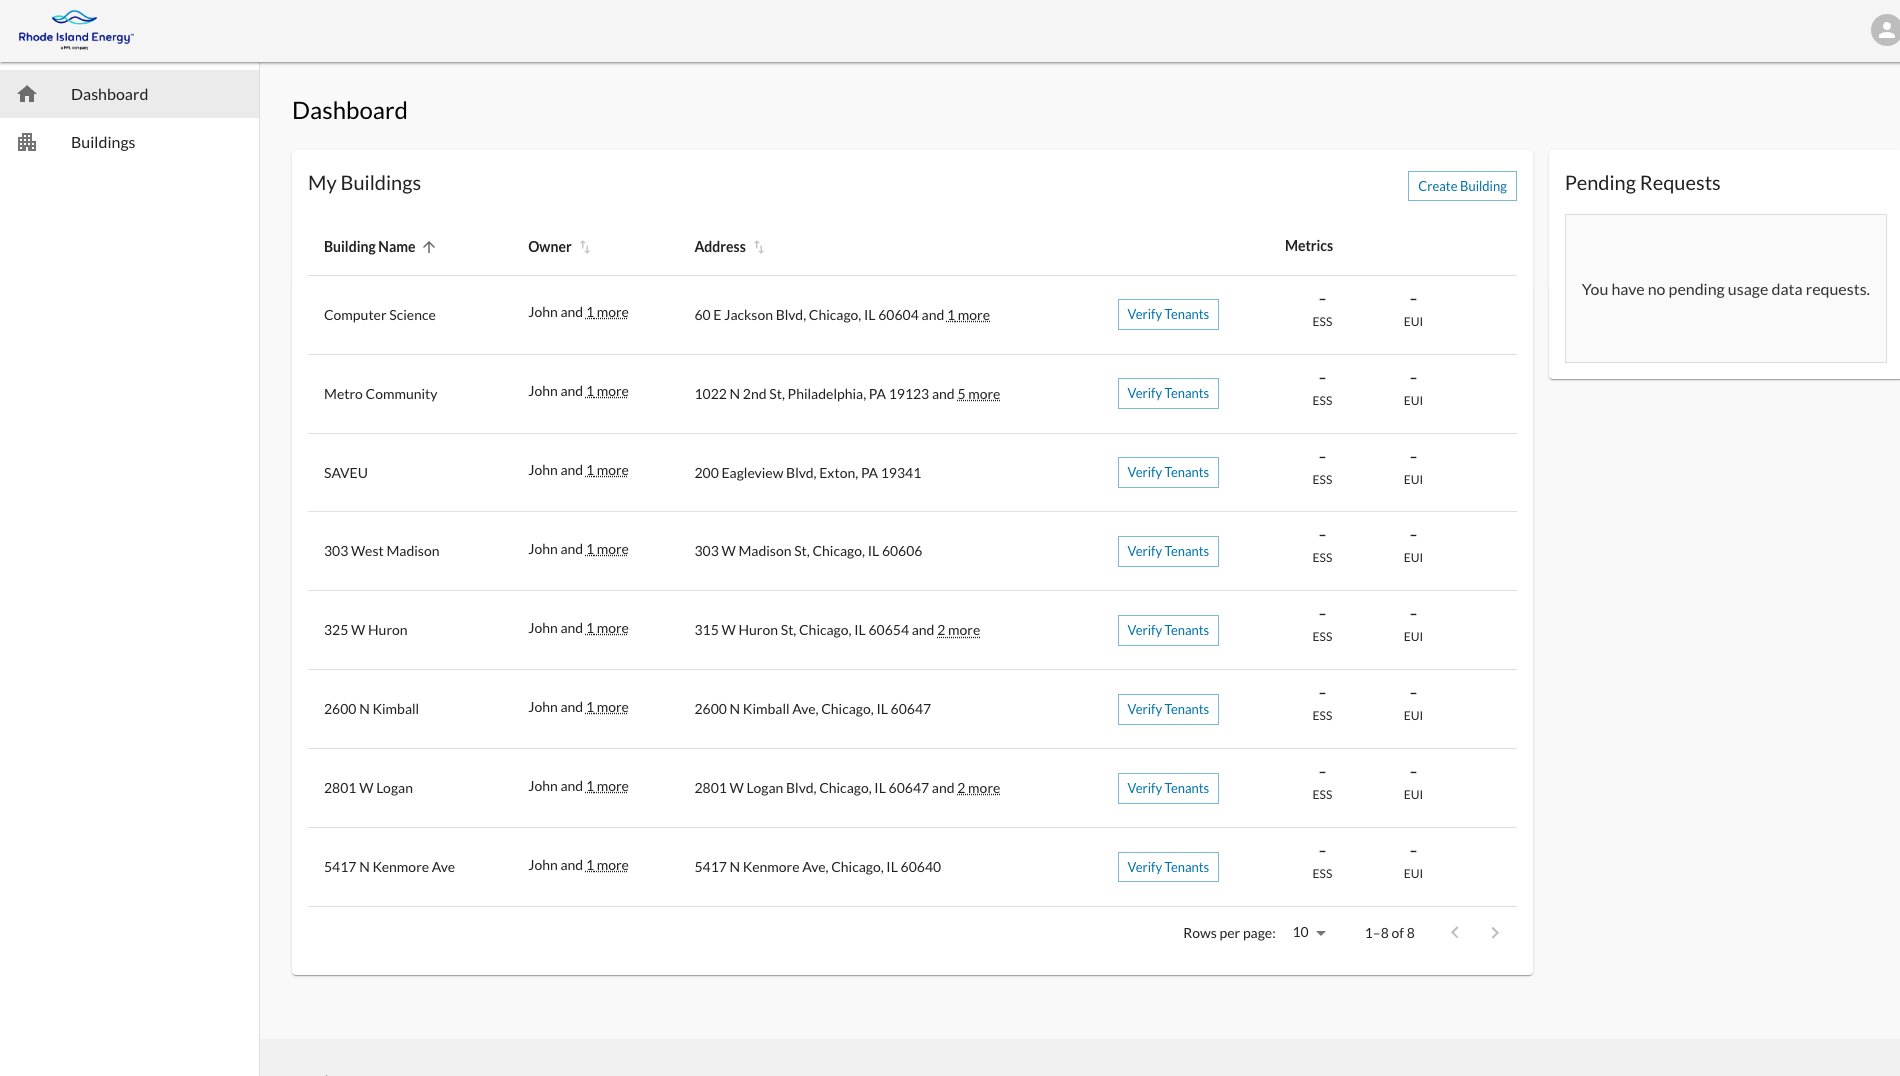
The Dashboard is the screen that greets the user upon logging in. It provides quick access to the features and information within the system. The Dashboard page also gives an overview of the buildings in your account and any buildings awaiting tenant verification.
The Dashboard can be quickly accessed from any page within the application by clicking on the Dashboard link on the left-side navigation menu. A Building Owner can also access their buildings and usage requests by clicking on the Buildings link on the left-side navigation menu.
Learn more about Rhode Island Energy's energy efficiency programs that can help you reduce your energy consumption. Users can also request a free facility assessment, or reach out to Rhode Island Energy's efficiency program team to learn about other energy-saving opportunities.
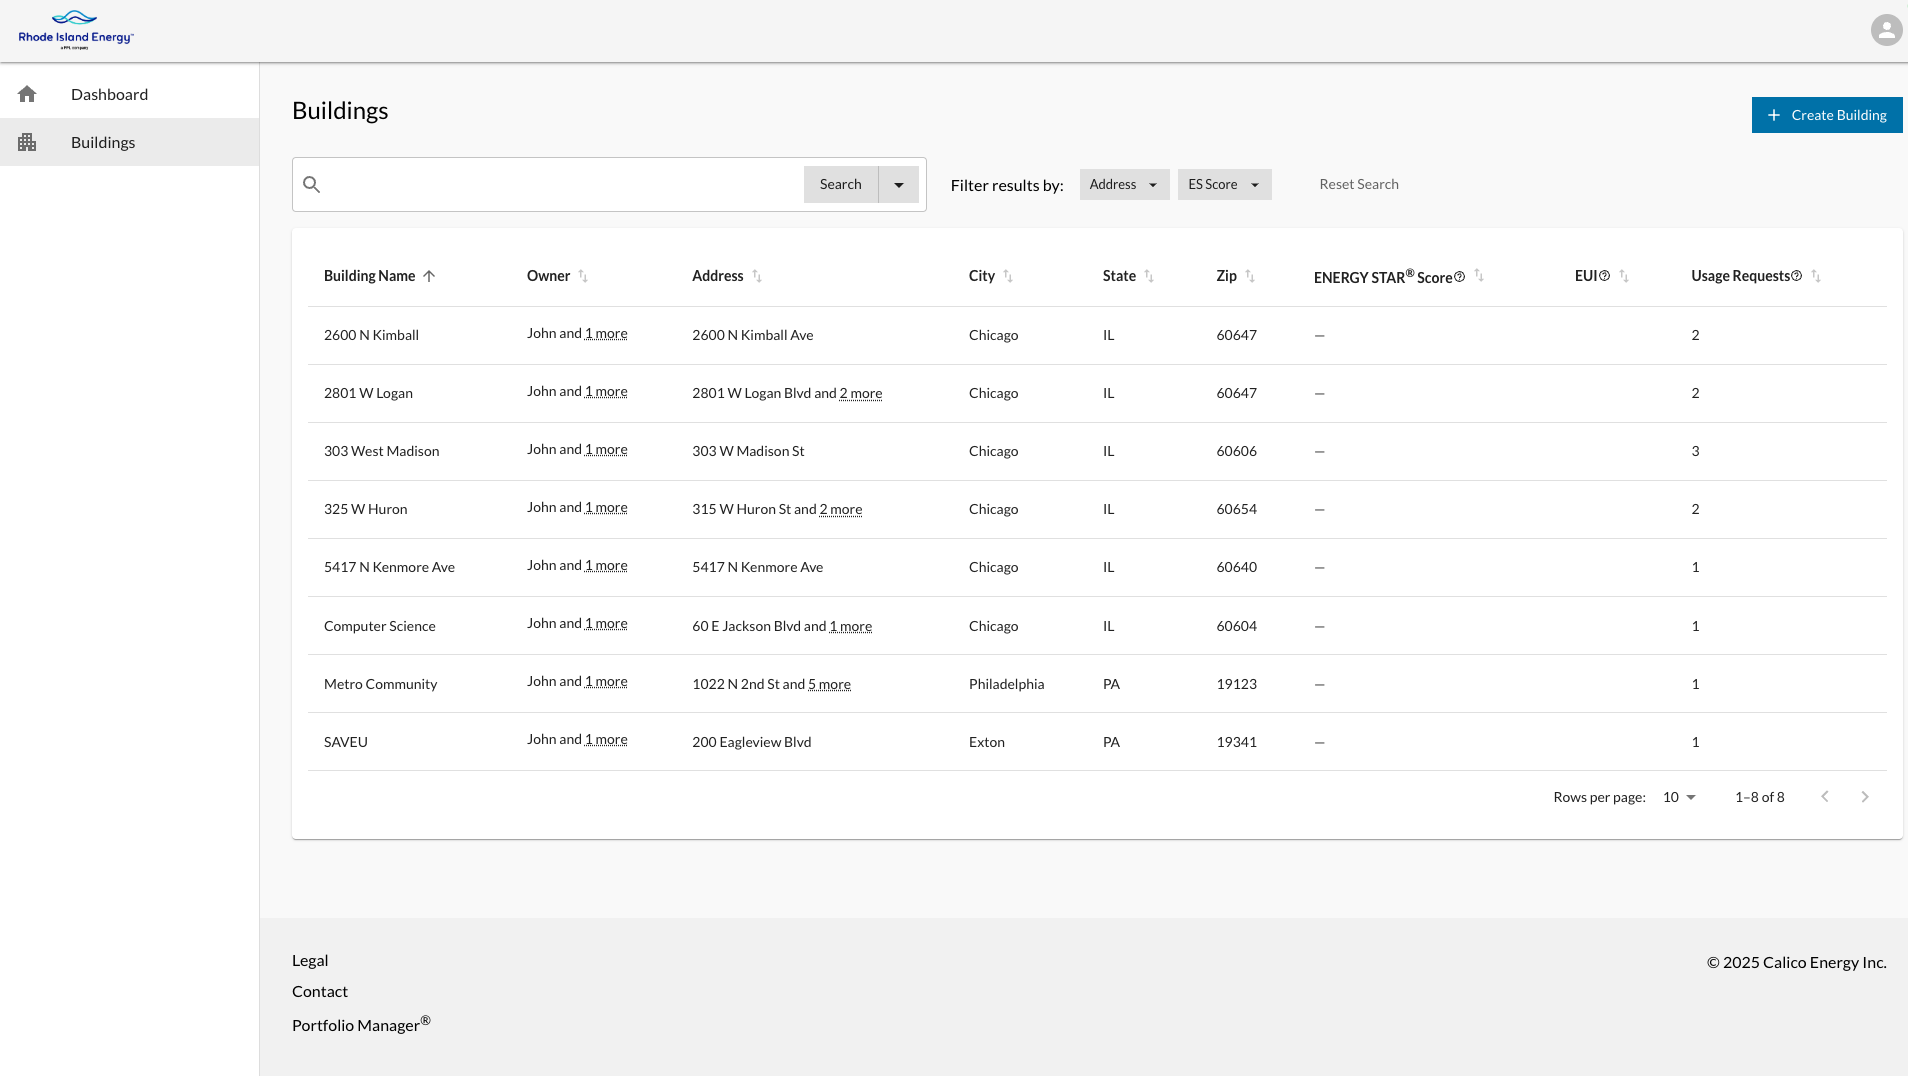
A Building Owner can access their buildings and usage requests by clicking on the Buildings link on the left-side navigation menu. This will bring you to a list of the buildings associated with your account.
To access a building’s information:
- From the Dashboard, find and click on the desired building.
OR
- Click the Buildings link on the left-side navigation menu
- Search for the desired building.
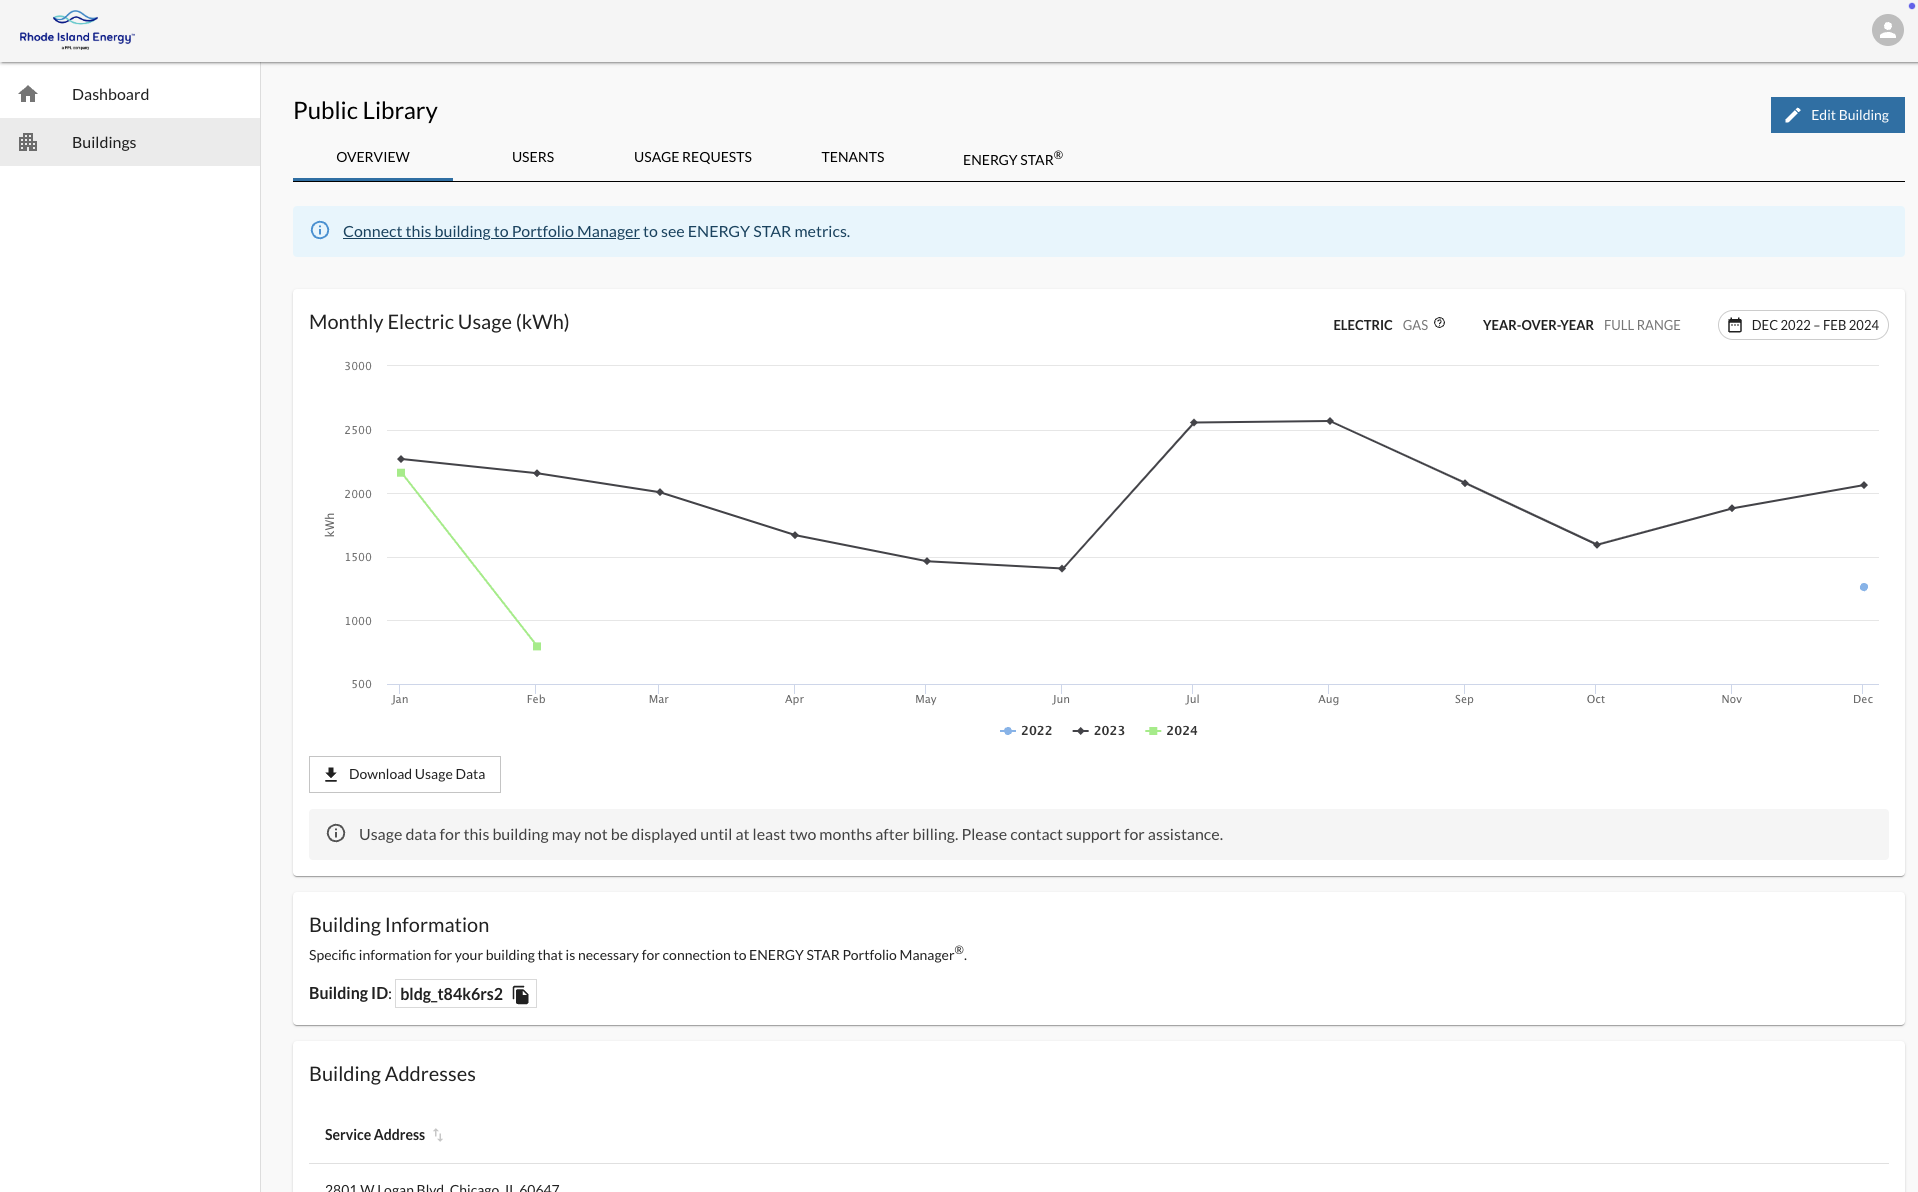
For multi-tenant or owner-occupied Building Owners, if you have previously verified the tenant(s) for your building and your usage request has been approved, you will see a screen showing monthly energy data and the building addresses listed for the building.
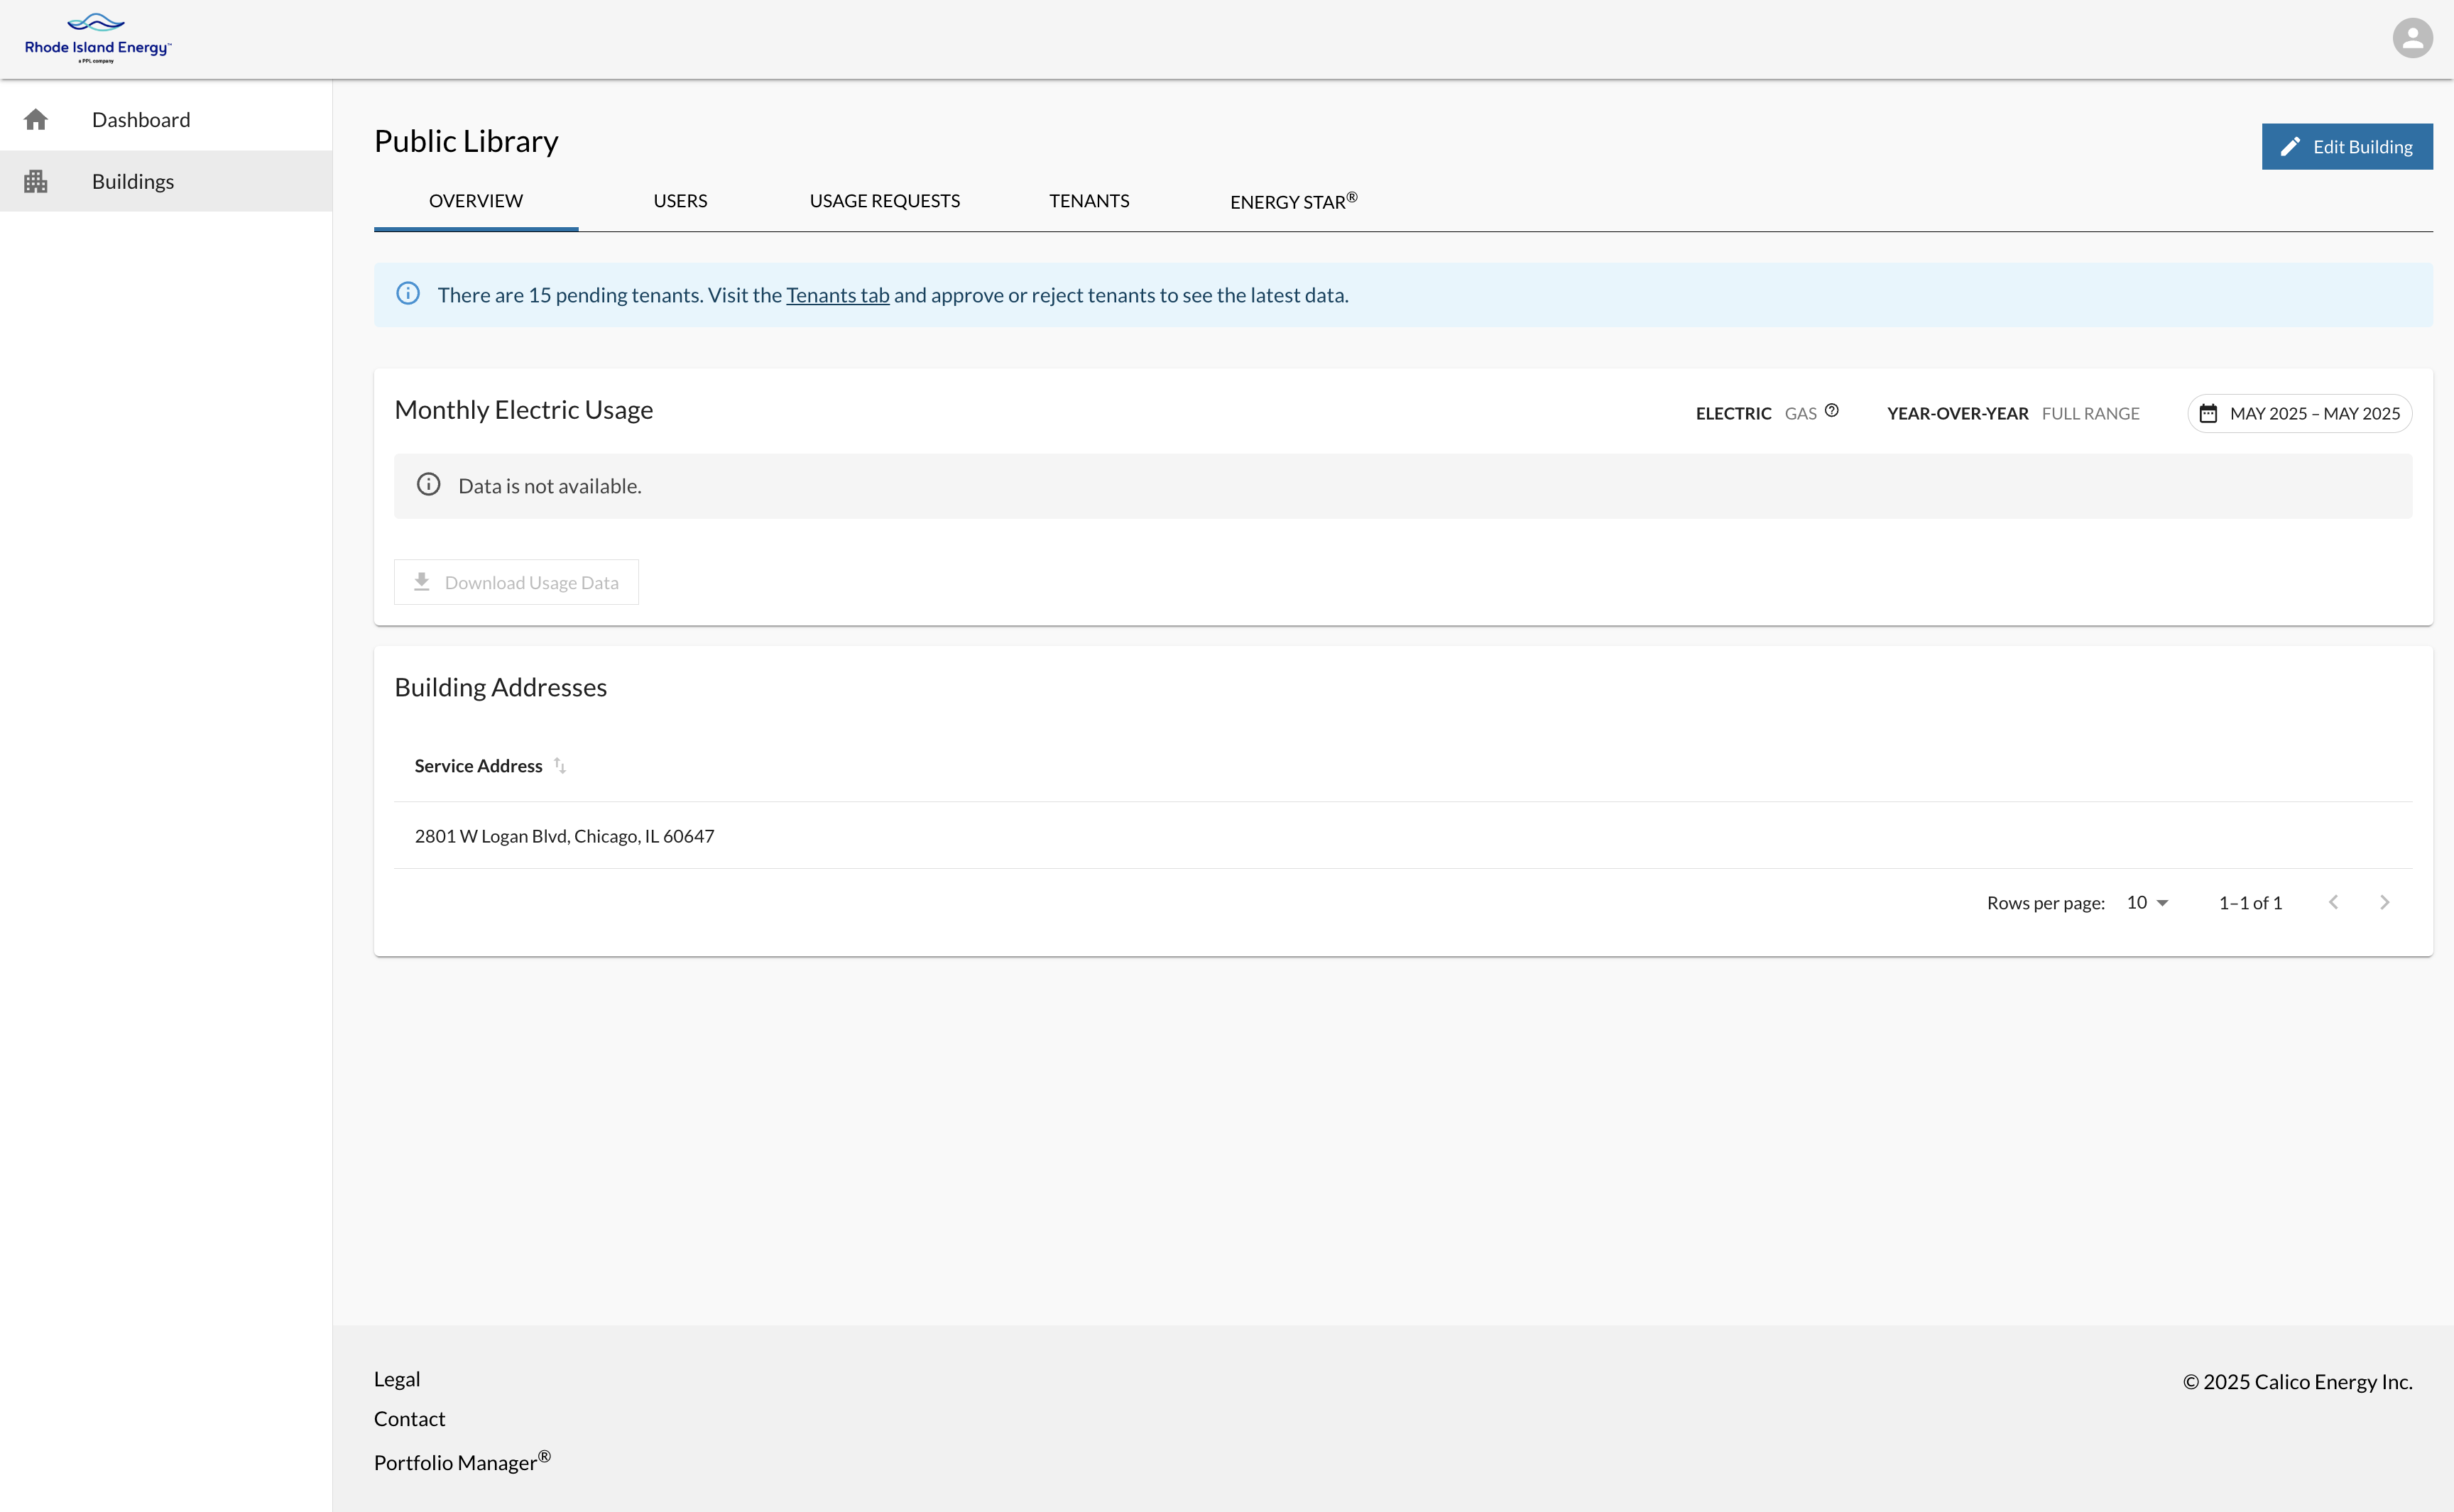
If tenants have not yet been verified or your usage request has not yet been submitted or approved, you will see a “No data found” alert in place of the usage graph. The steps to complete tenant verification can be found in Section 4.2.4.2.1 – Tenant Verification Process. The steps to submit a usage request can be found in Section 4.2.3.1 – Create a Usage Request.
Please Note: Preferences for viewing and downloading usage data is discussed in Section 4.3 – Viewing and Downloading Usage.
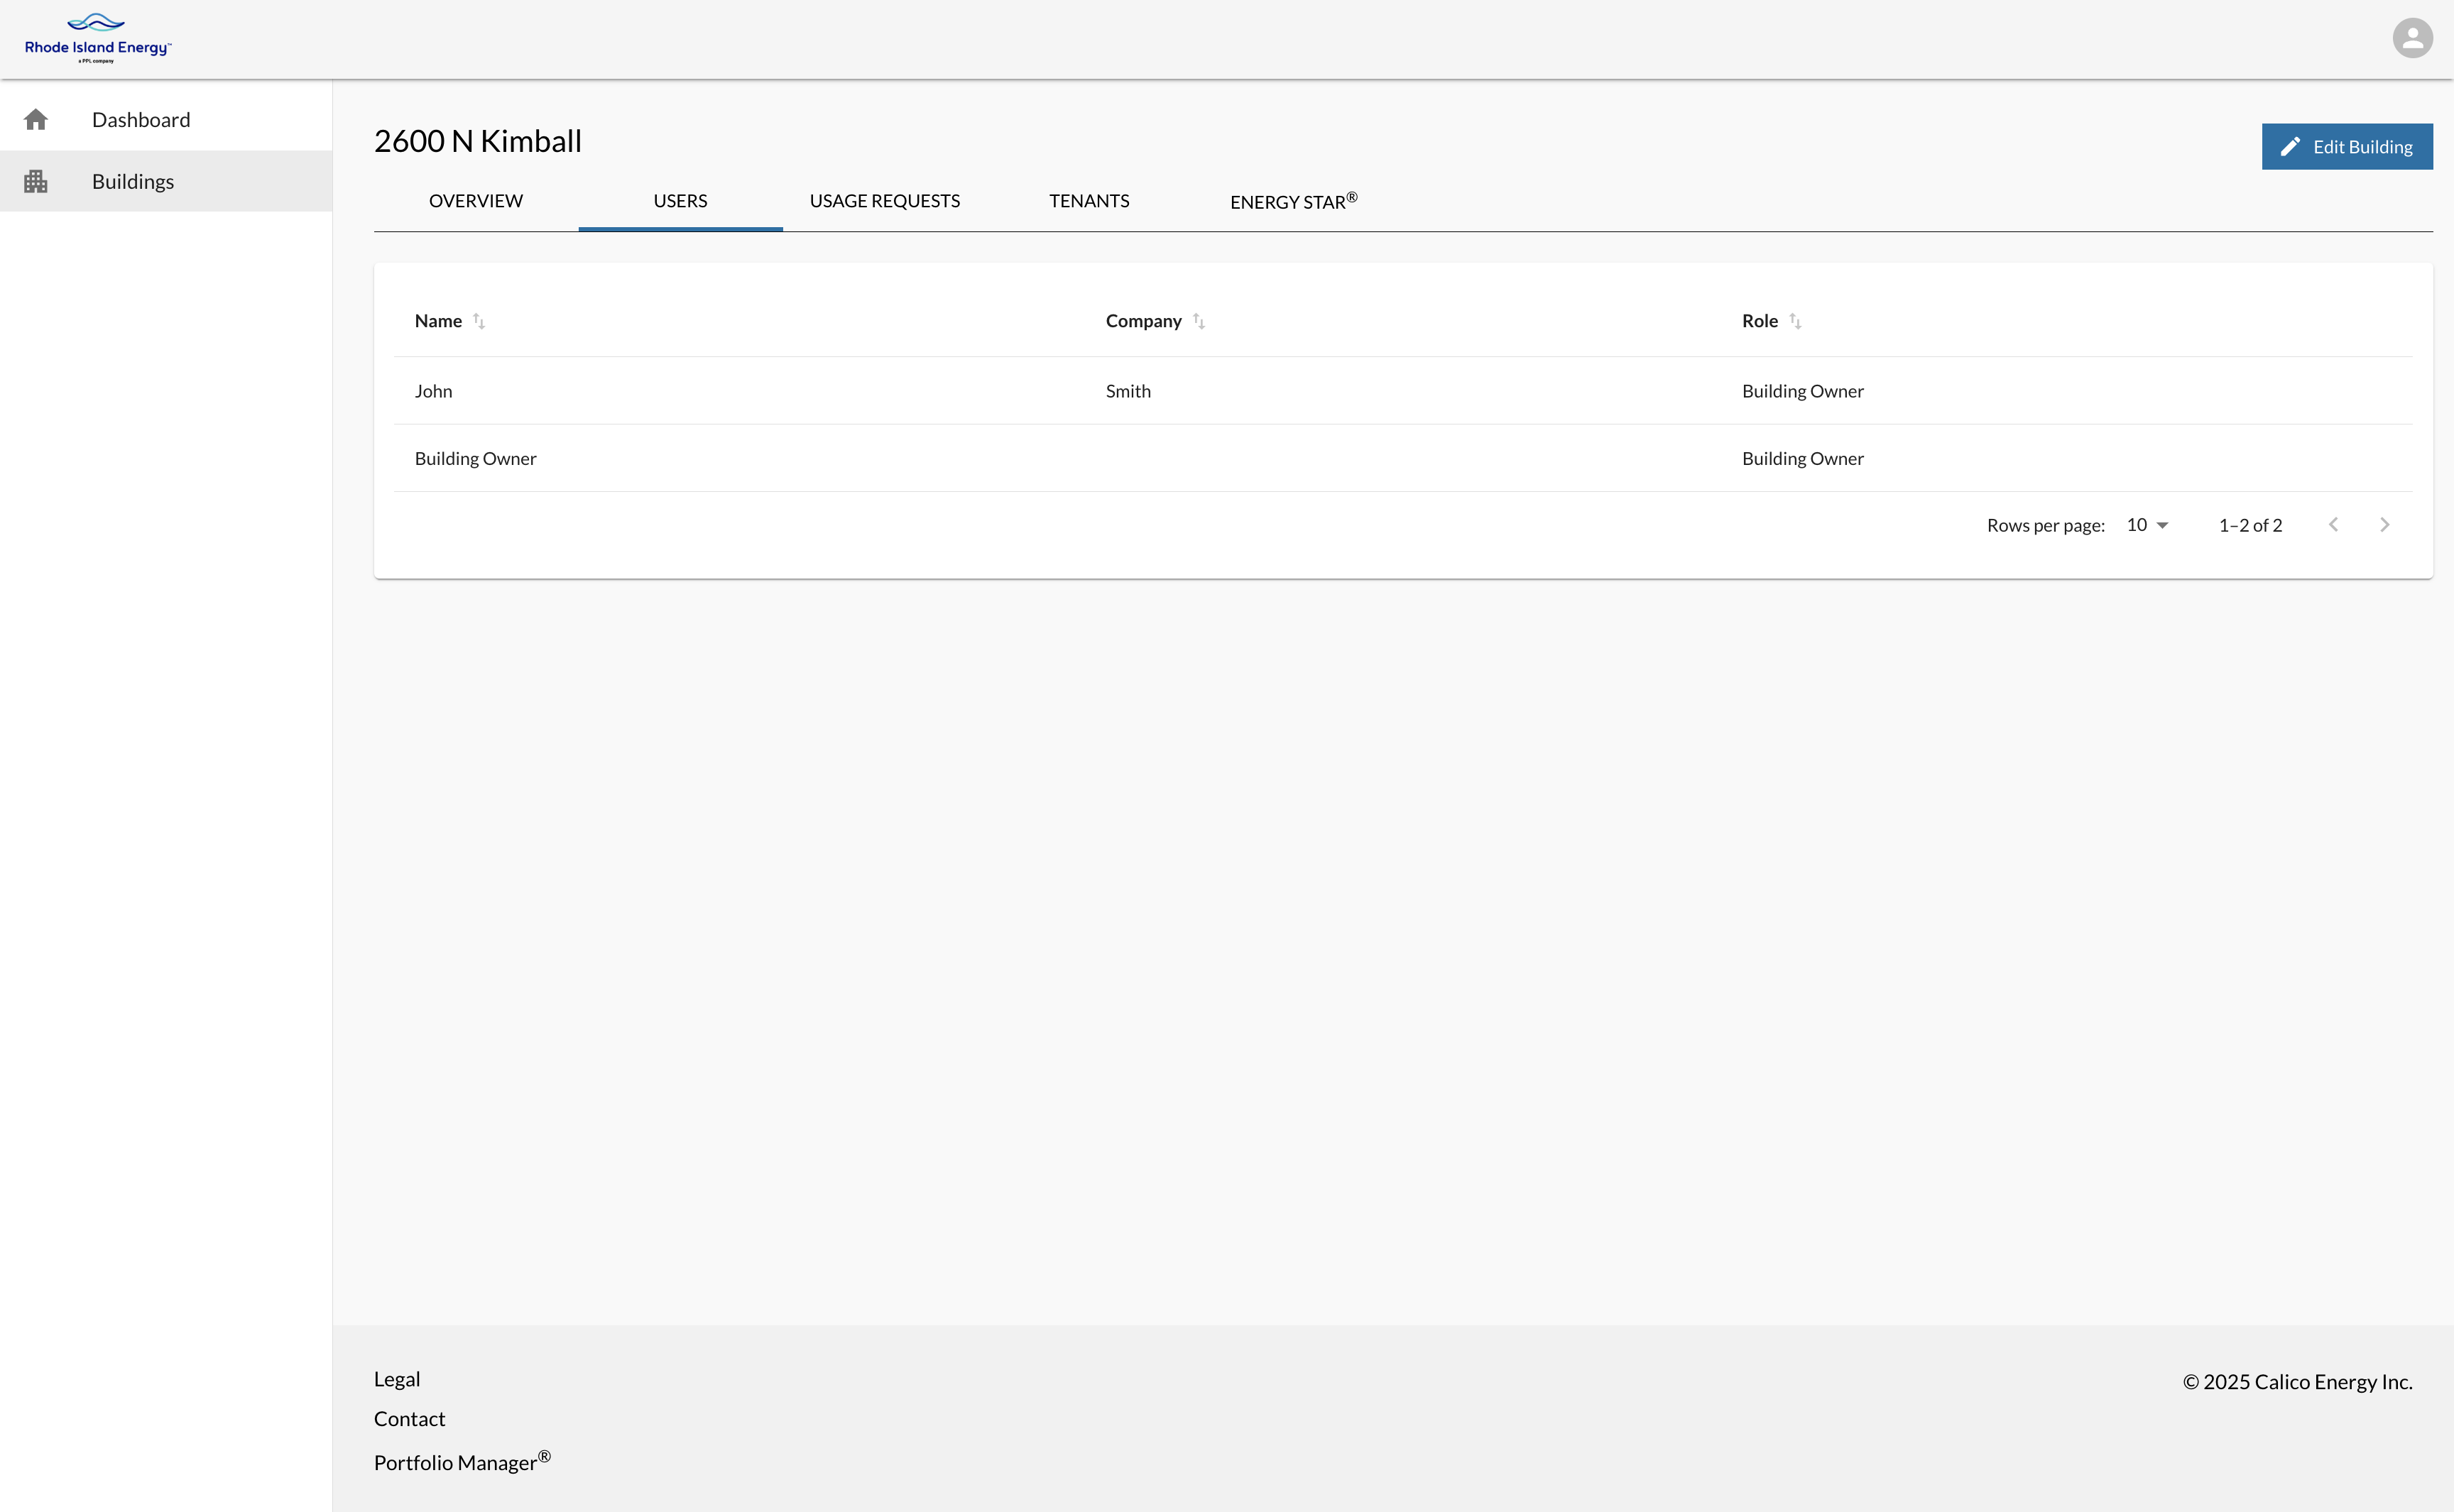
To view the users associated with the building, click on the Users tab found on the building’s profile.
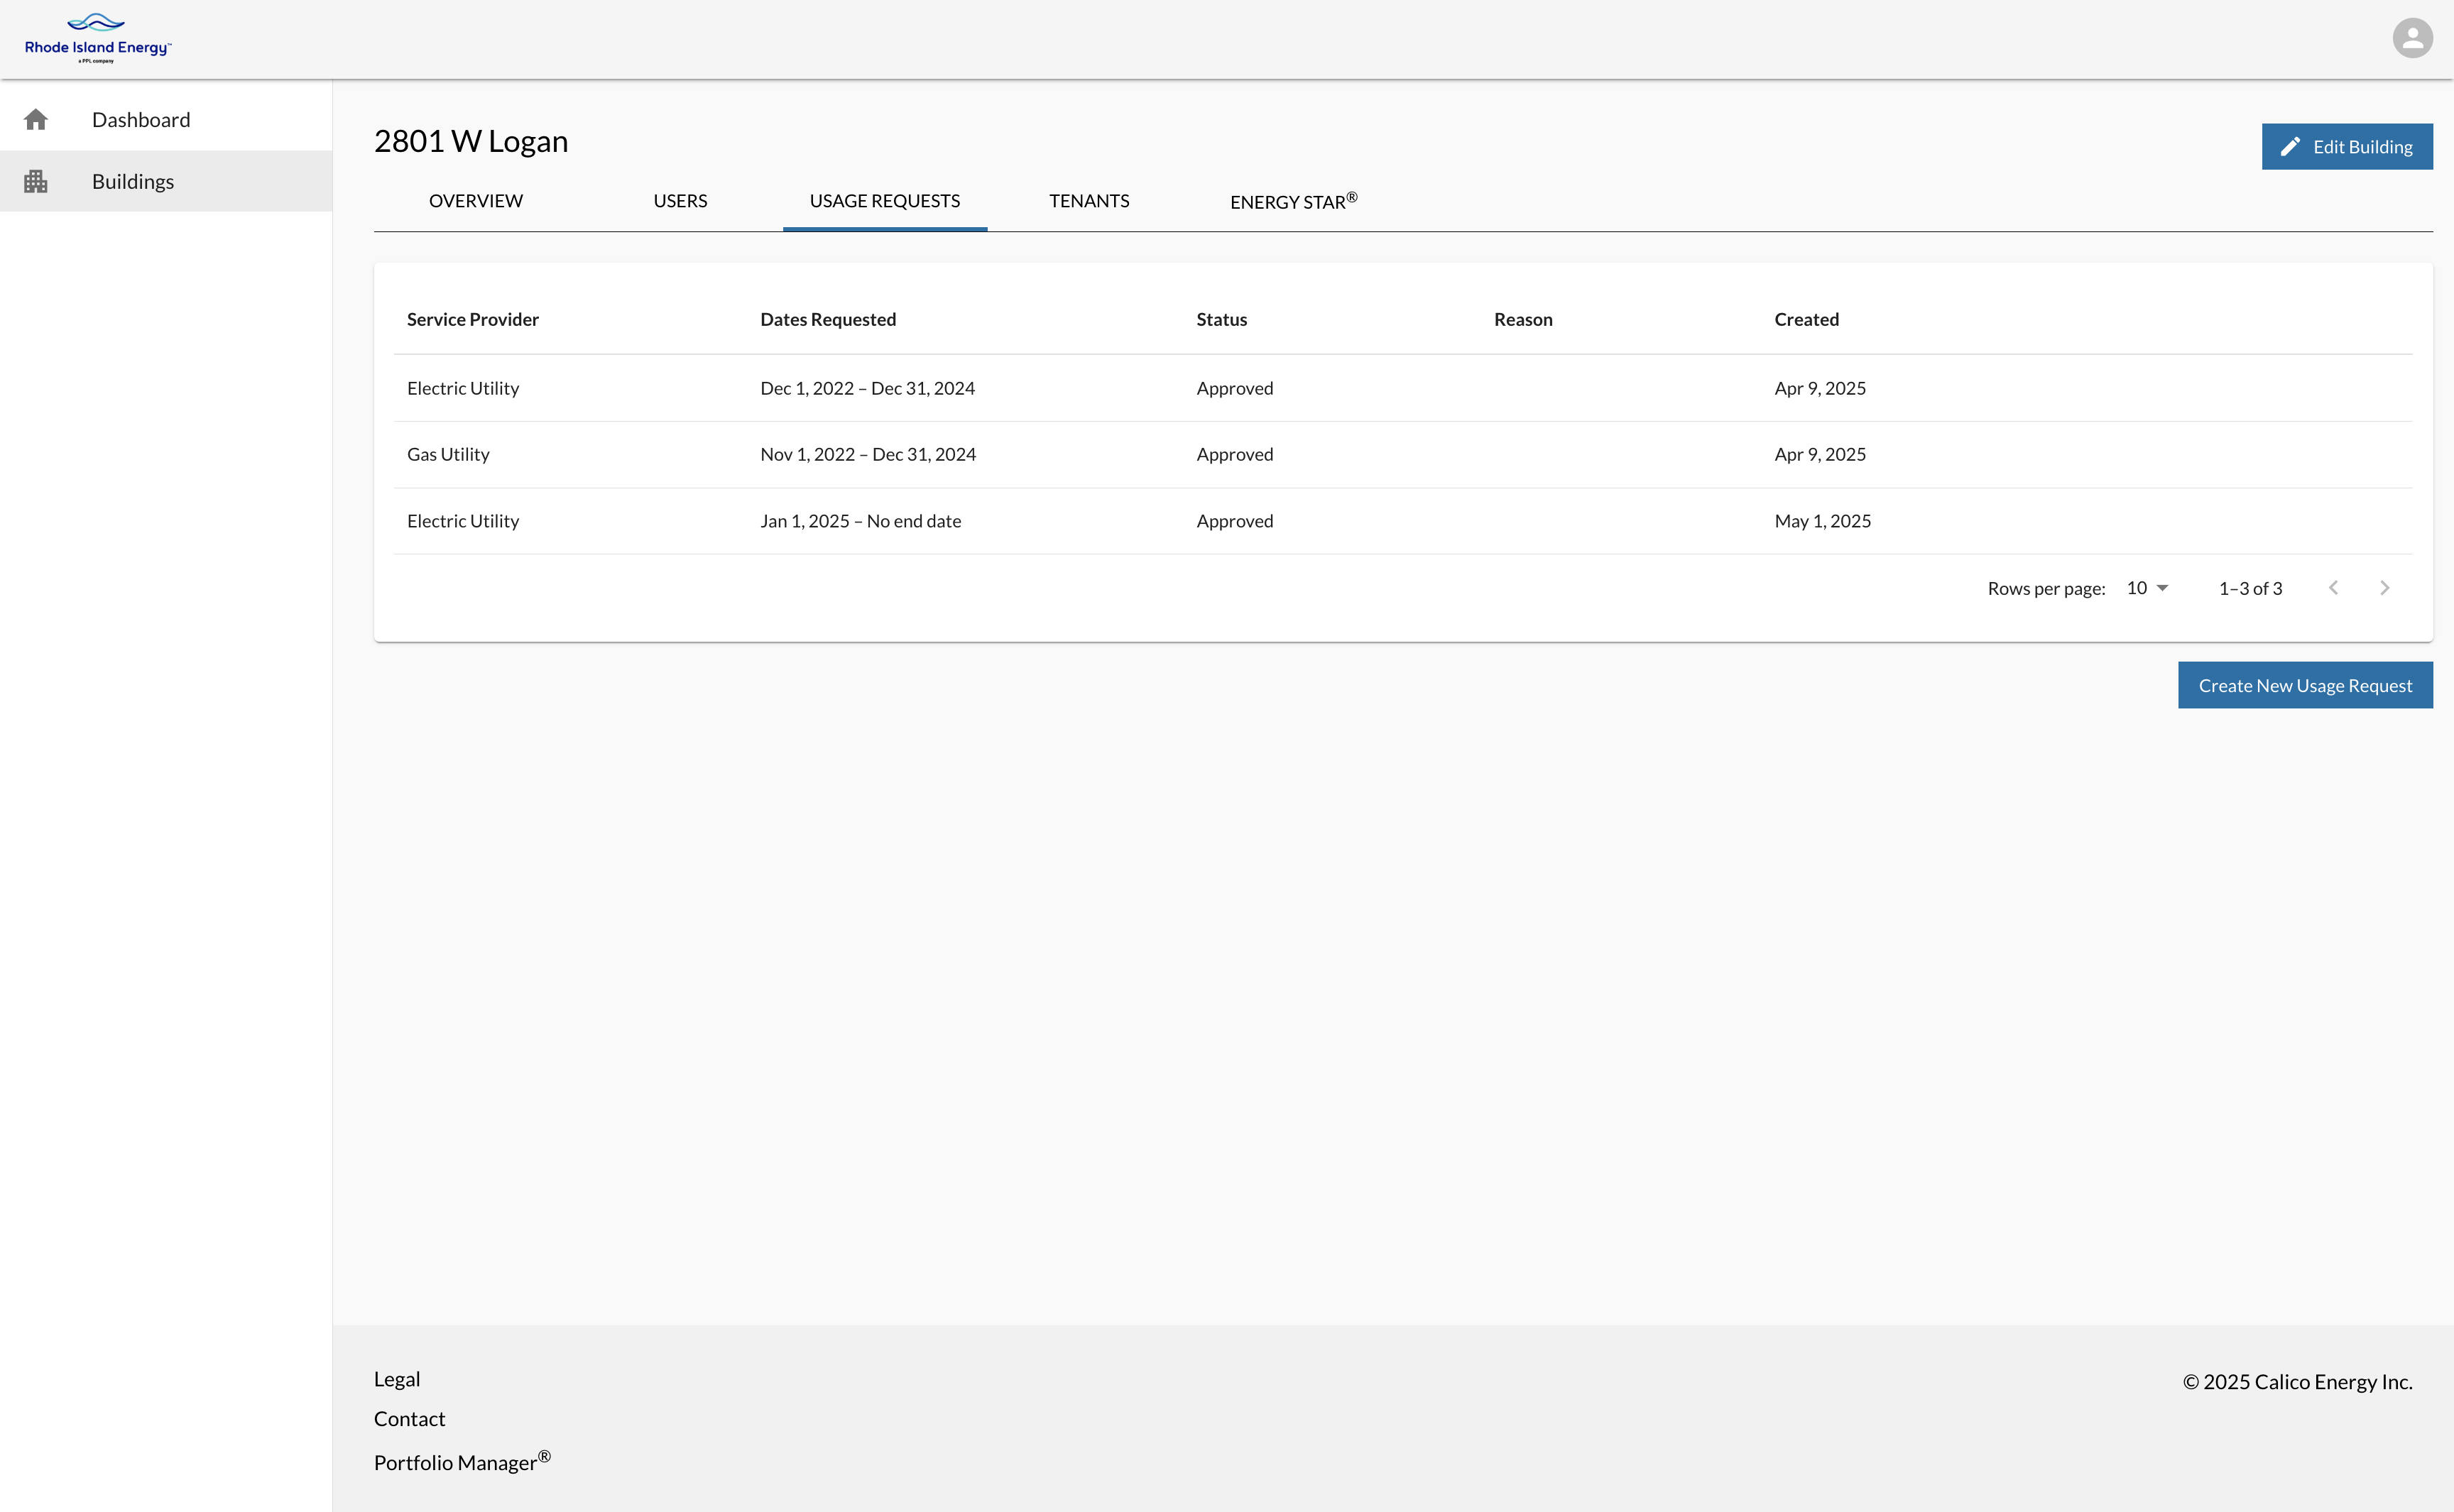
A usage request is needed to define the date range of usage data the user would like to view and download.
Users may create usage requests for three historical calendar years. If you need usage data prior to what is available, please contact support.
To view the usage requests created for the building, click on the Usage Requests tab.
4.2.3.1 Create a Usage Request
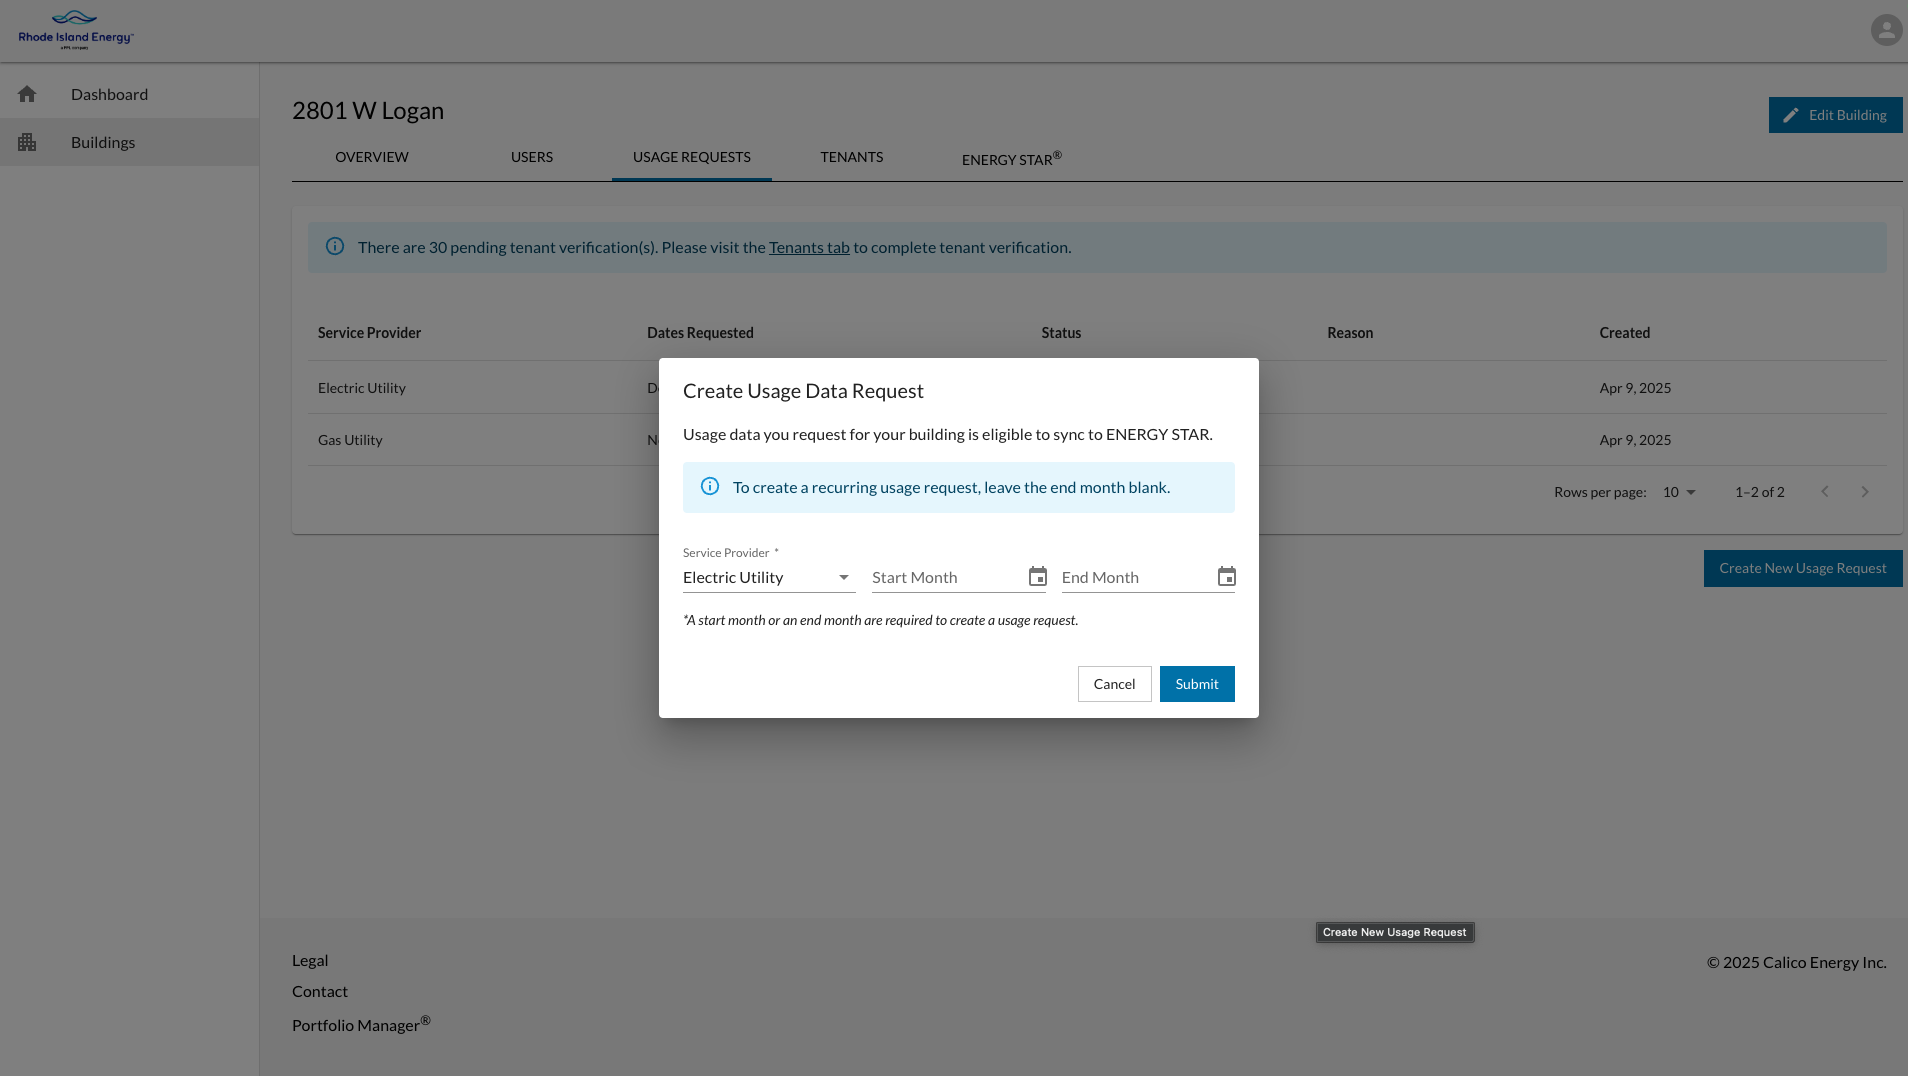
- Click the Usage Requests tab on the building page.
- Click Create New Usage Request.
- Select the service type for the request, then enter in a start month and year. To continue to receive the latest usage data each month, leave the end month field blank, then click Submit.
Once a usage request has been created, Building Owners may be required to provide tenant consent (if applicable) and verify units for the selected date range before usage data can be displayed.
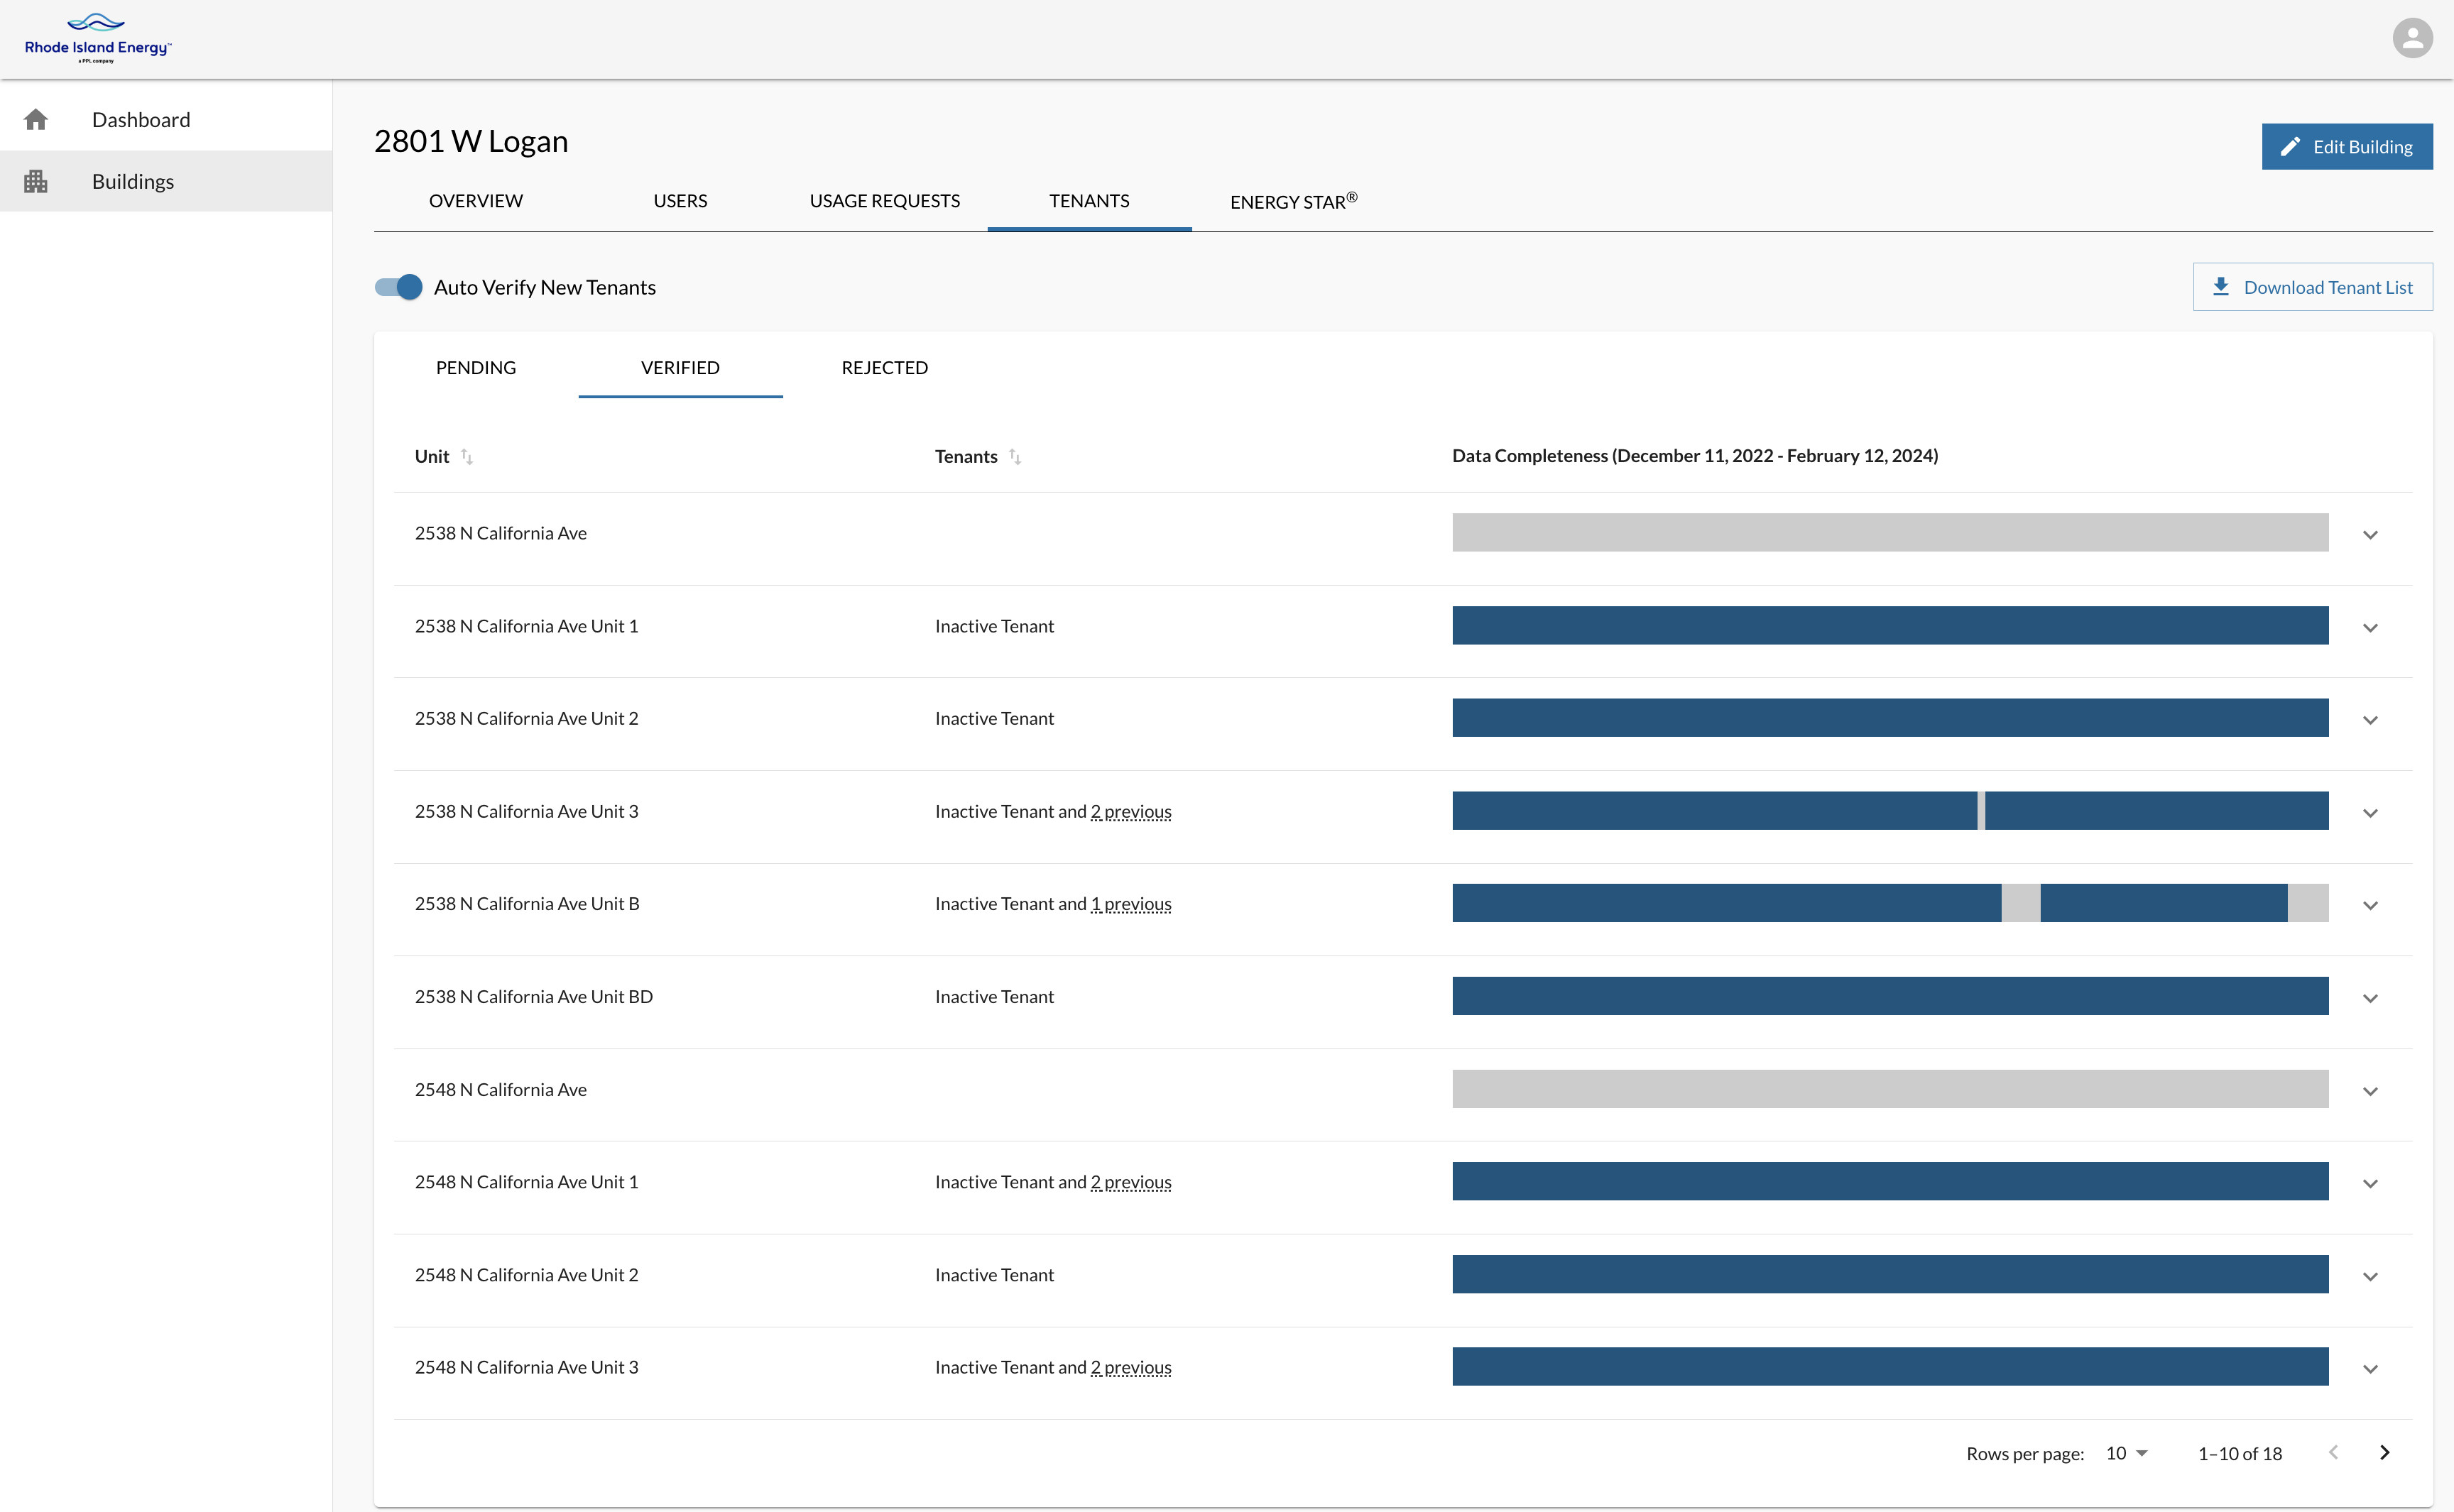
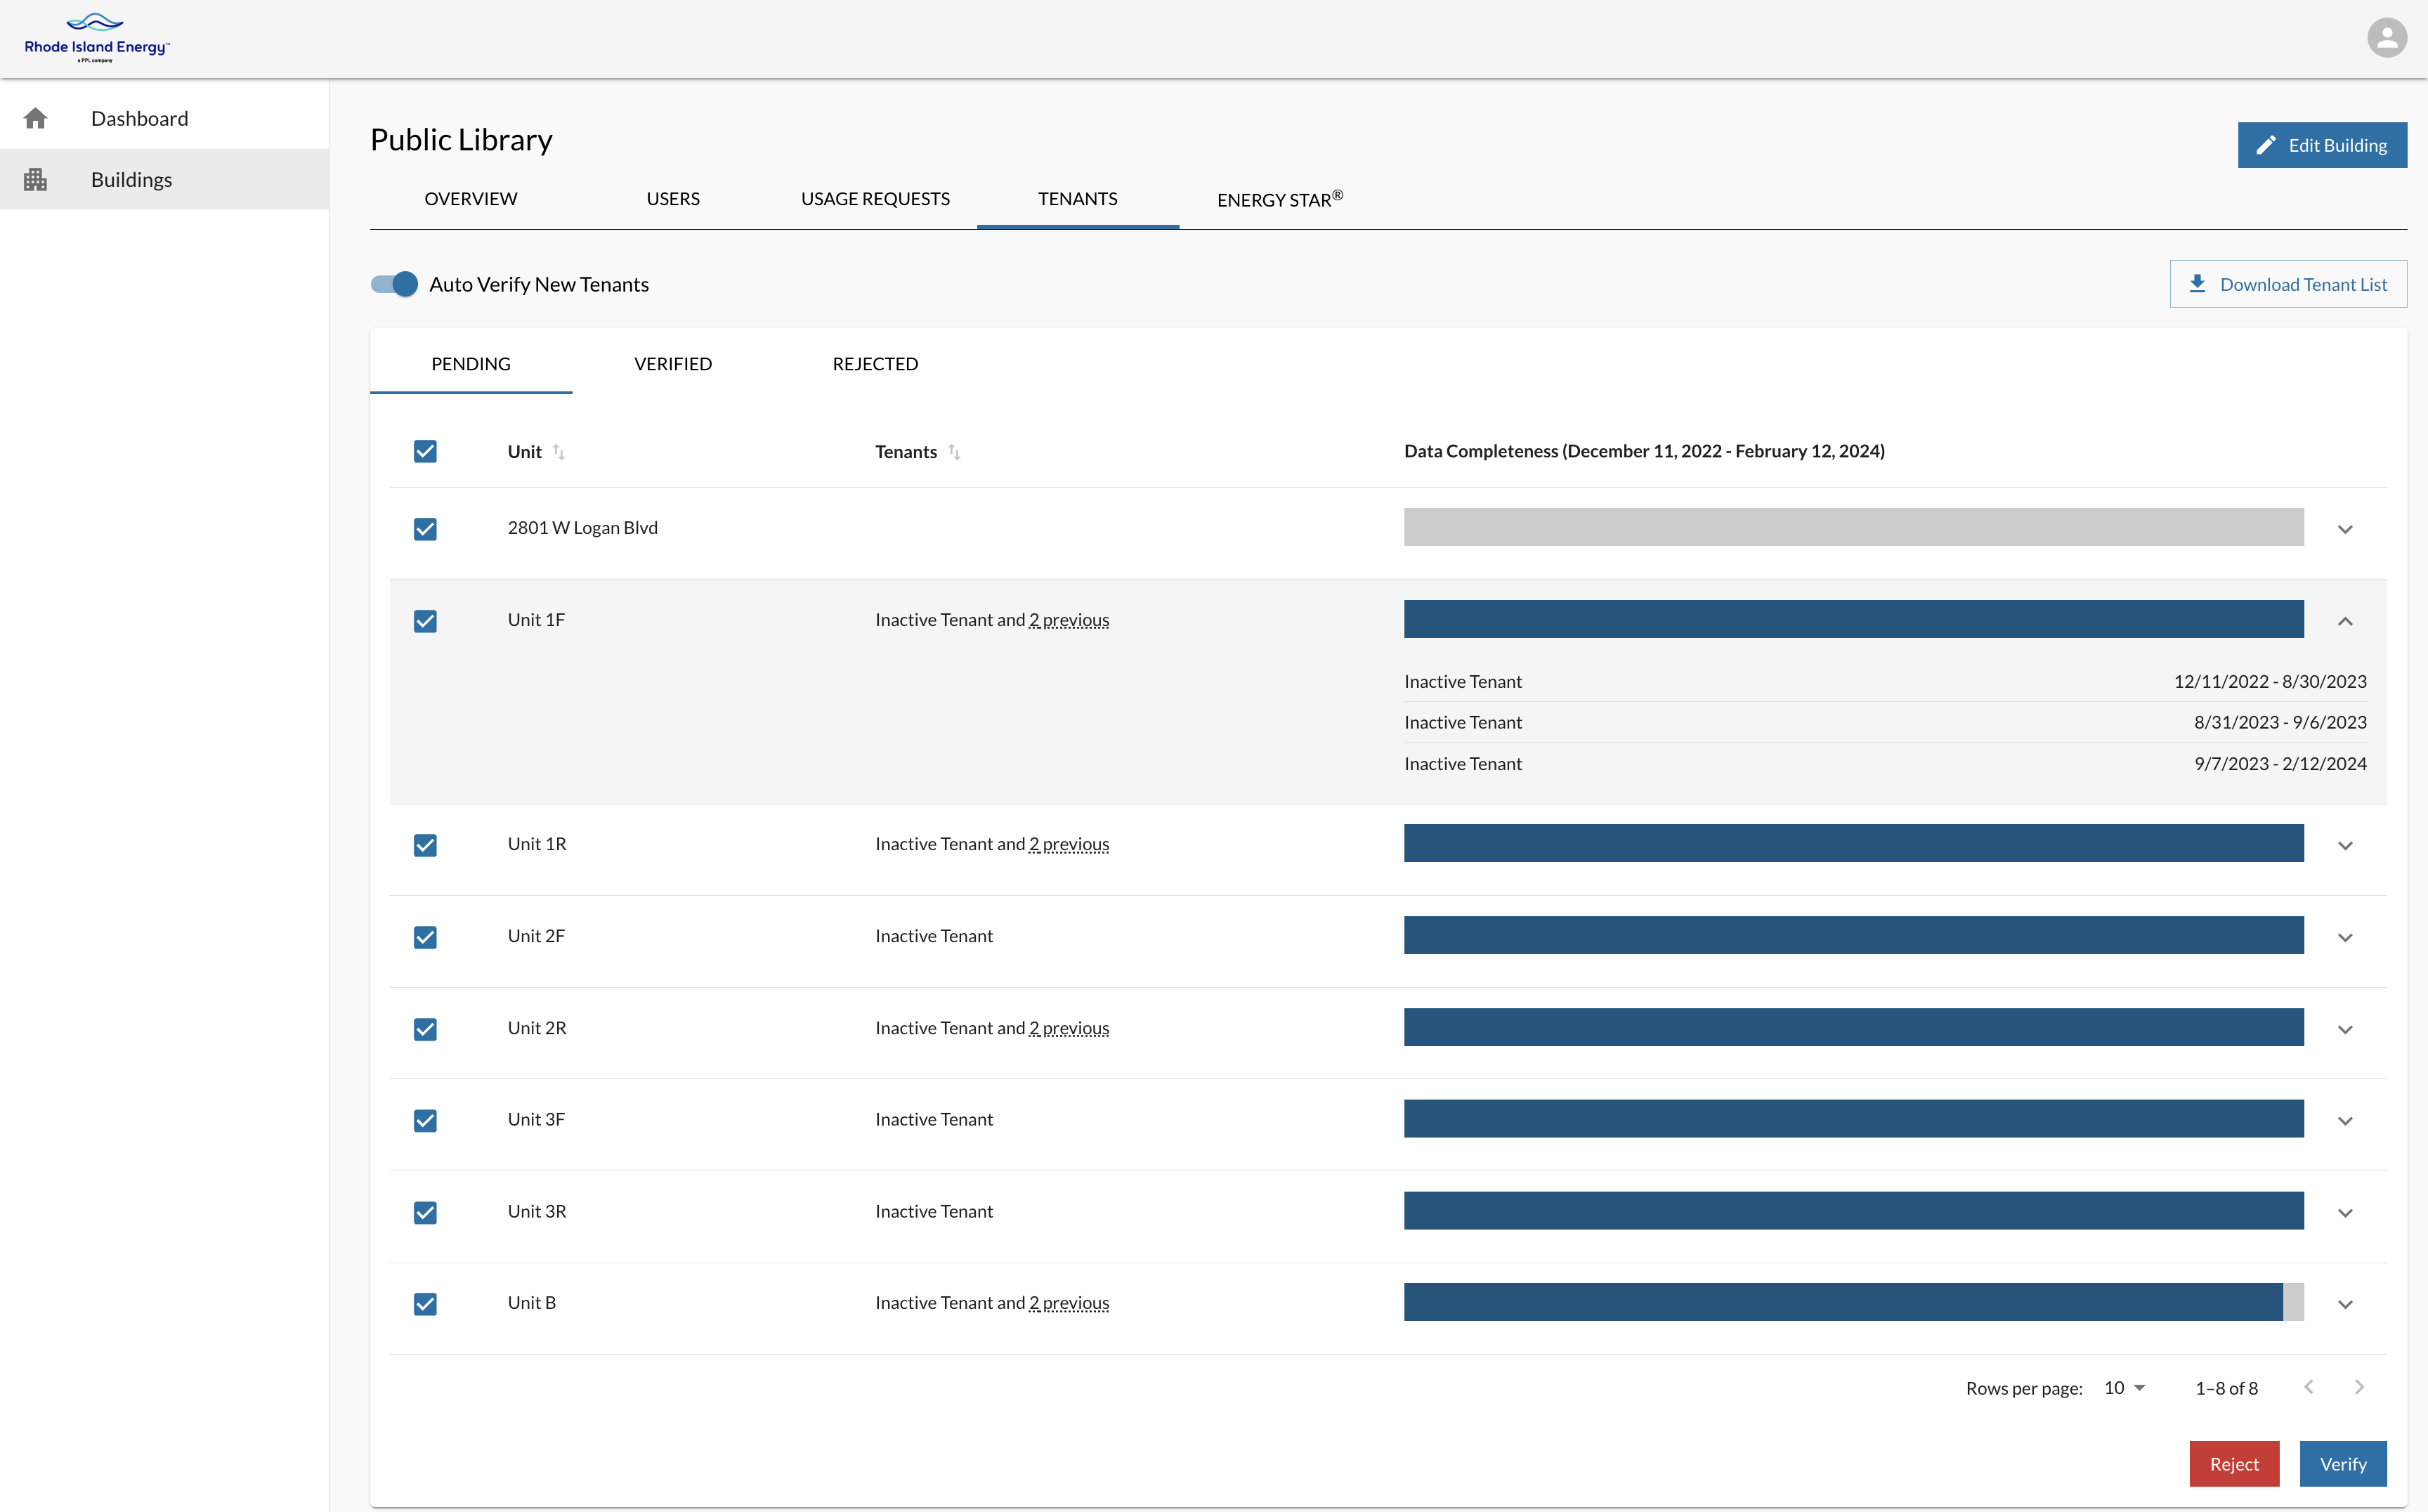
To view the units and meters associated with the building, click on the Tenants tab on the building’s profile. By default, the most recent tenants are shown first, and all former tenants can be viewed by hovering over the More link. You may also click the arrow to view the dates each tenant resided in the unit.
If tenants have previously been verified, they will be listed under the Verified section of the page.
Meter numbers associated with each unit are displayed beneath the unit name. Meter numbers in BDP have a hyphenated structure of ########-########. The numbers after the hyphen correspond to the meter number shown on physical meters, bills, or elsewhere.
The Data Completeness column shows data completeness for each unit. Gaps in the data completeness bar may indicate no usage during the specified time period, missing data or billing issues when hovering over the bar. If there are tenants missing or data is expected, but not shown, please contact support@energyusage.rienergy.com.
To download a .CSV of all the tenants, unit numbers, meter numbers, and active/inactive dates, click the Download Tenant List button on the top right of the Tenants tab.
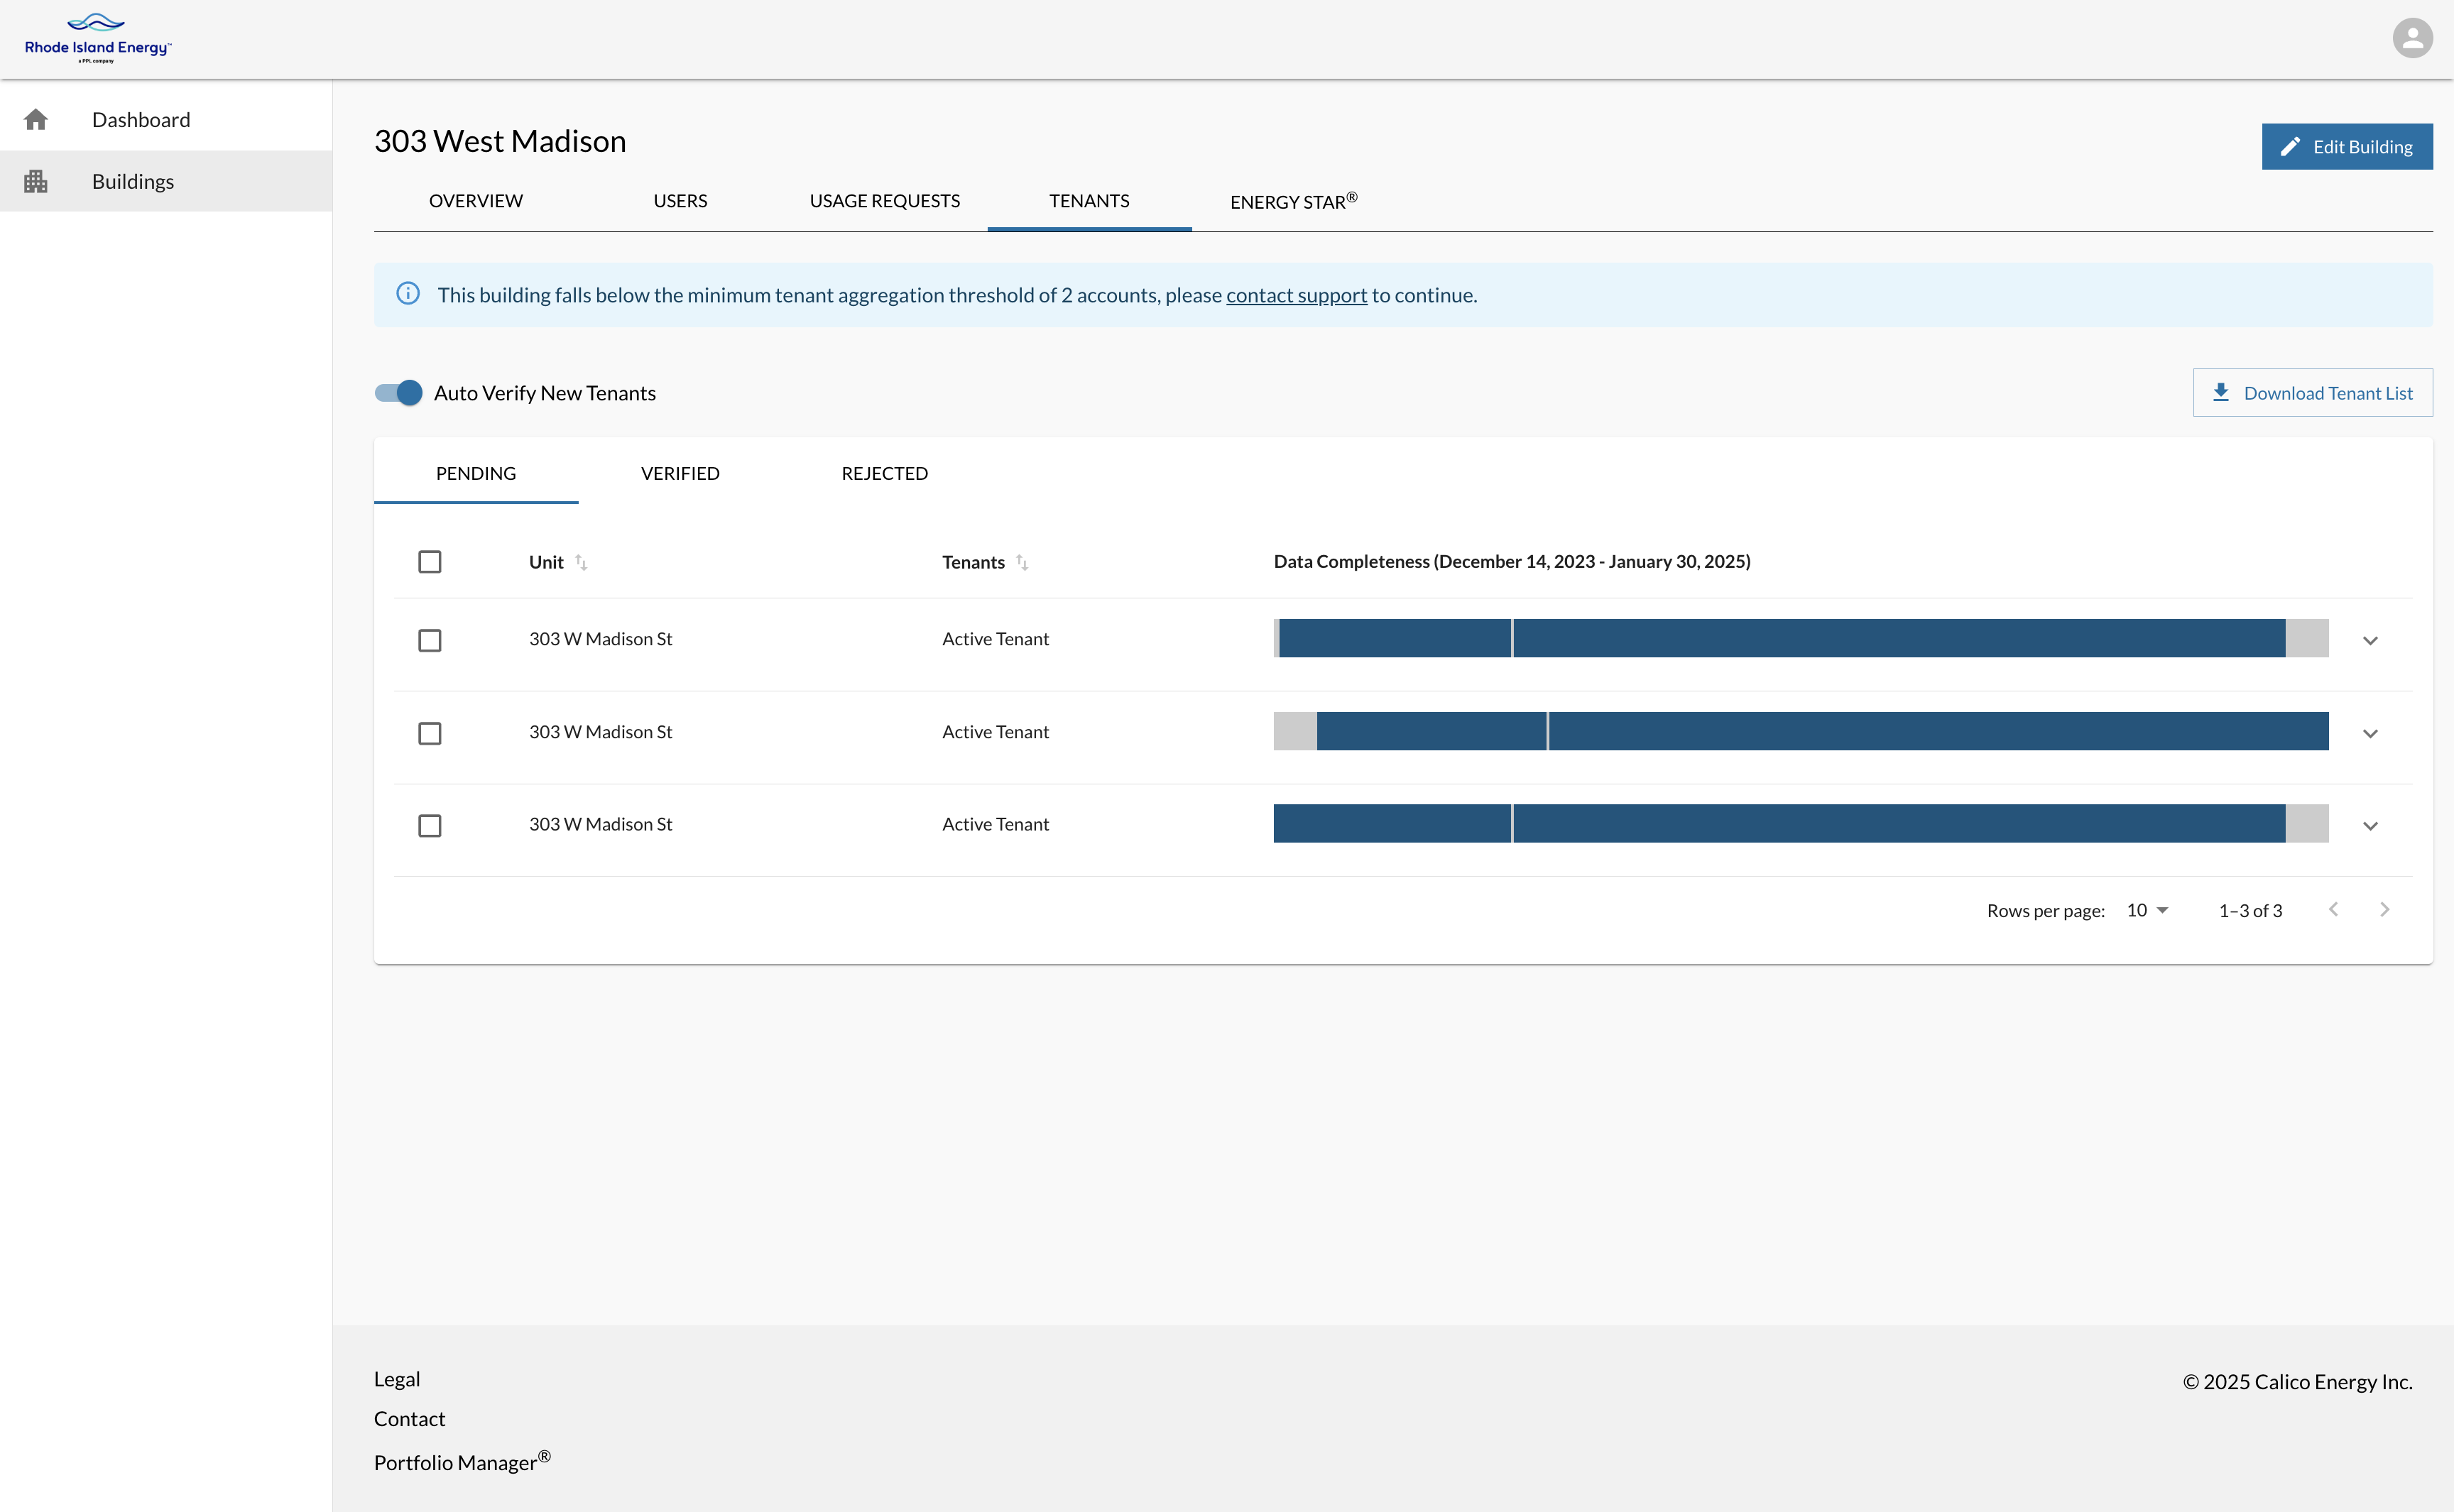
Tenant consent is required if the building’s total active tenants falls below four (4). Usage data for your building will be displayed as zero until consent is received if your building falls below the threshold.
To provide consent for your building, submit your tenant consent forms through our secure file transfer portal see section 2.1 New Accounts for full instructions. Once you have delivered signed consent forms through the portal, a Program Administrator will verify the tenant consent forms submitted and update each unit’s tenant consent status.
4.2.4.2.1 Tenant Verification Process
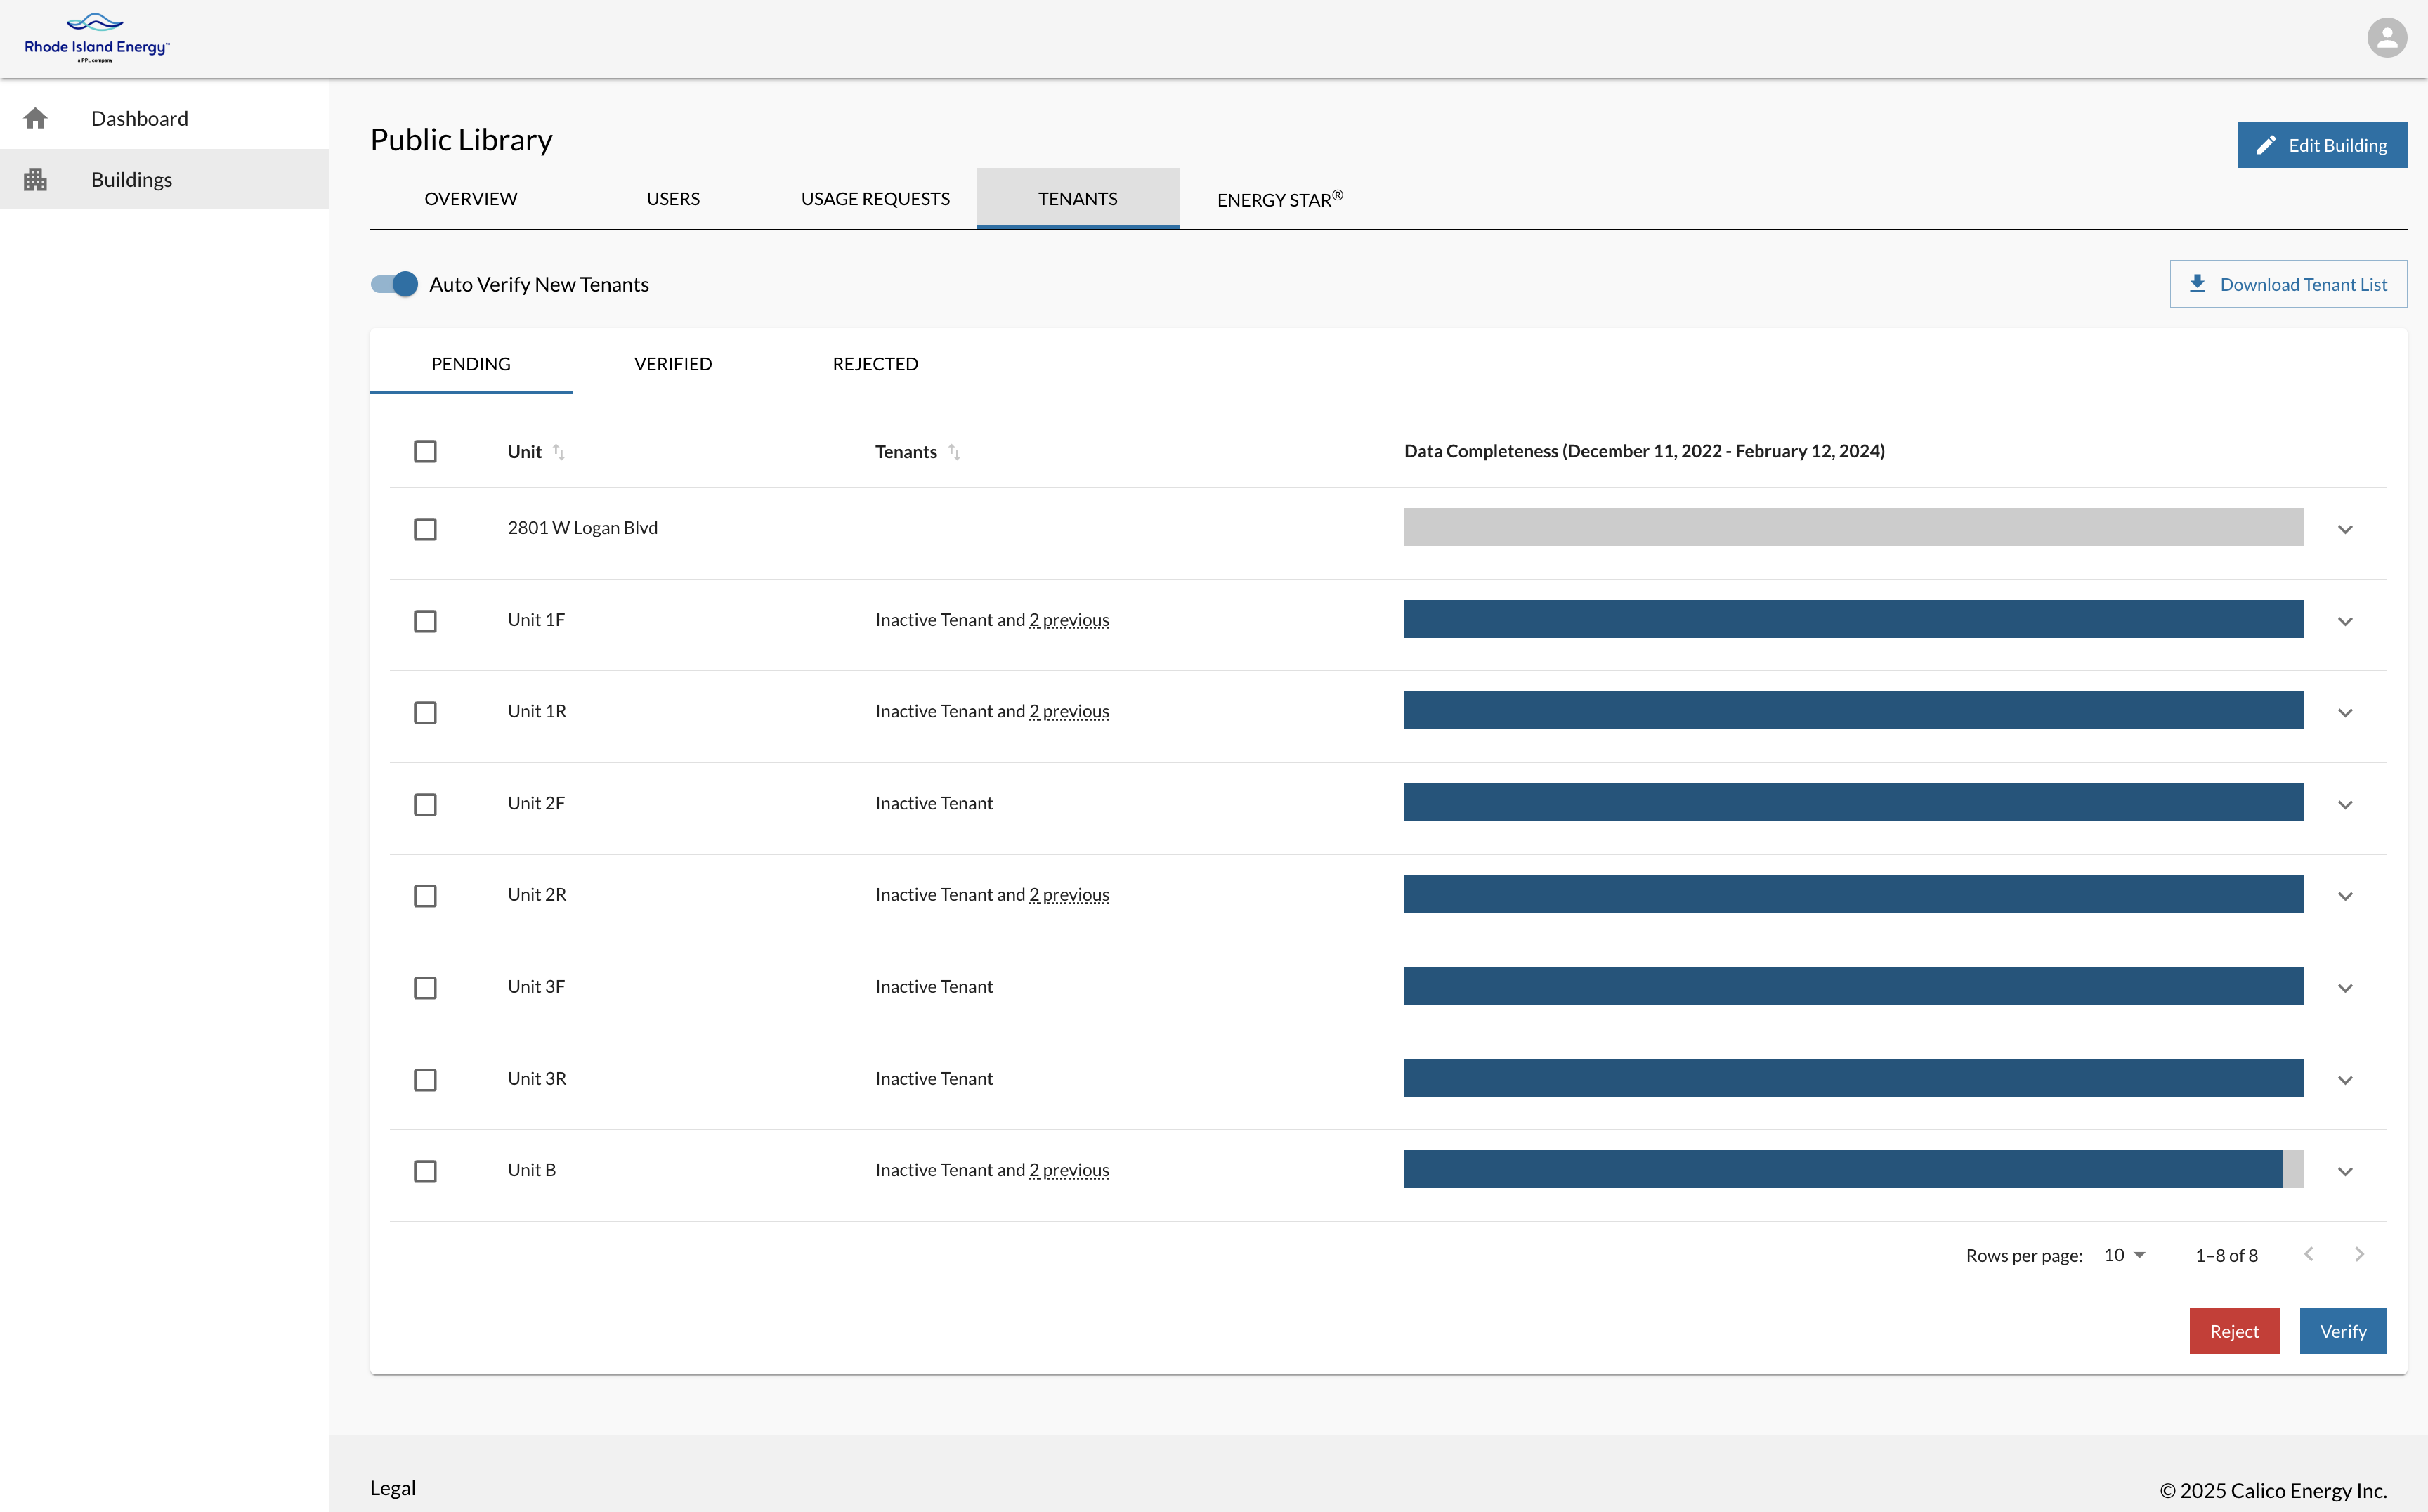
Units will be available for verification as soon as a usage request has been created. If there are units awaiting verification, they will be listed under the Pending section of the page. If units have previously been verified, they will be listed under the Verified section of the page.
Each time a new tenant’s data is available for an already-verified unit, users are required to verify the new tenant unless Auto Verify New Tenants is turned on.
To download the tenants list, click the Download Tenant List button on the top right of the page. A comma separated values (.CSV) file of all tenants that are pending or verified will be downloaded. All units must be verified or rejected to view and download usage data.
Please carefully review the tenants list. If there are units missing, please contact support at support@energyusage.rienergy.com.
To verify tenants:
- Click on the checkbox at the top of the tenant list or click on each individual checkbox.
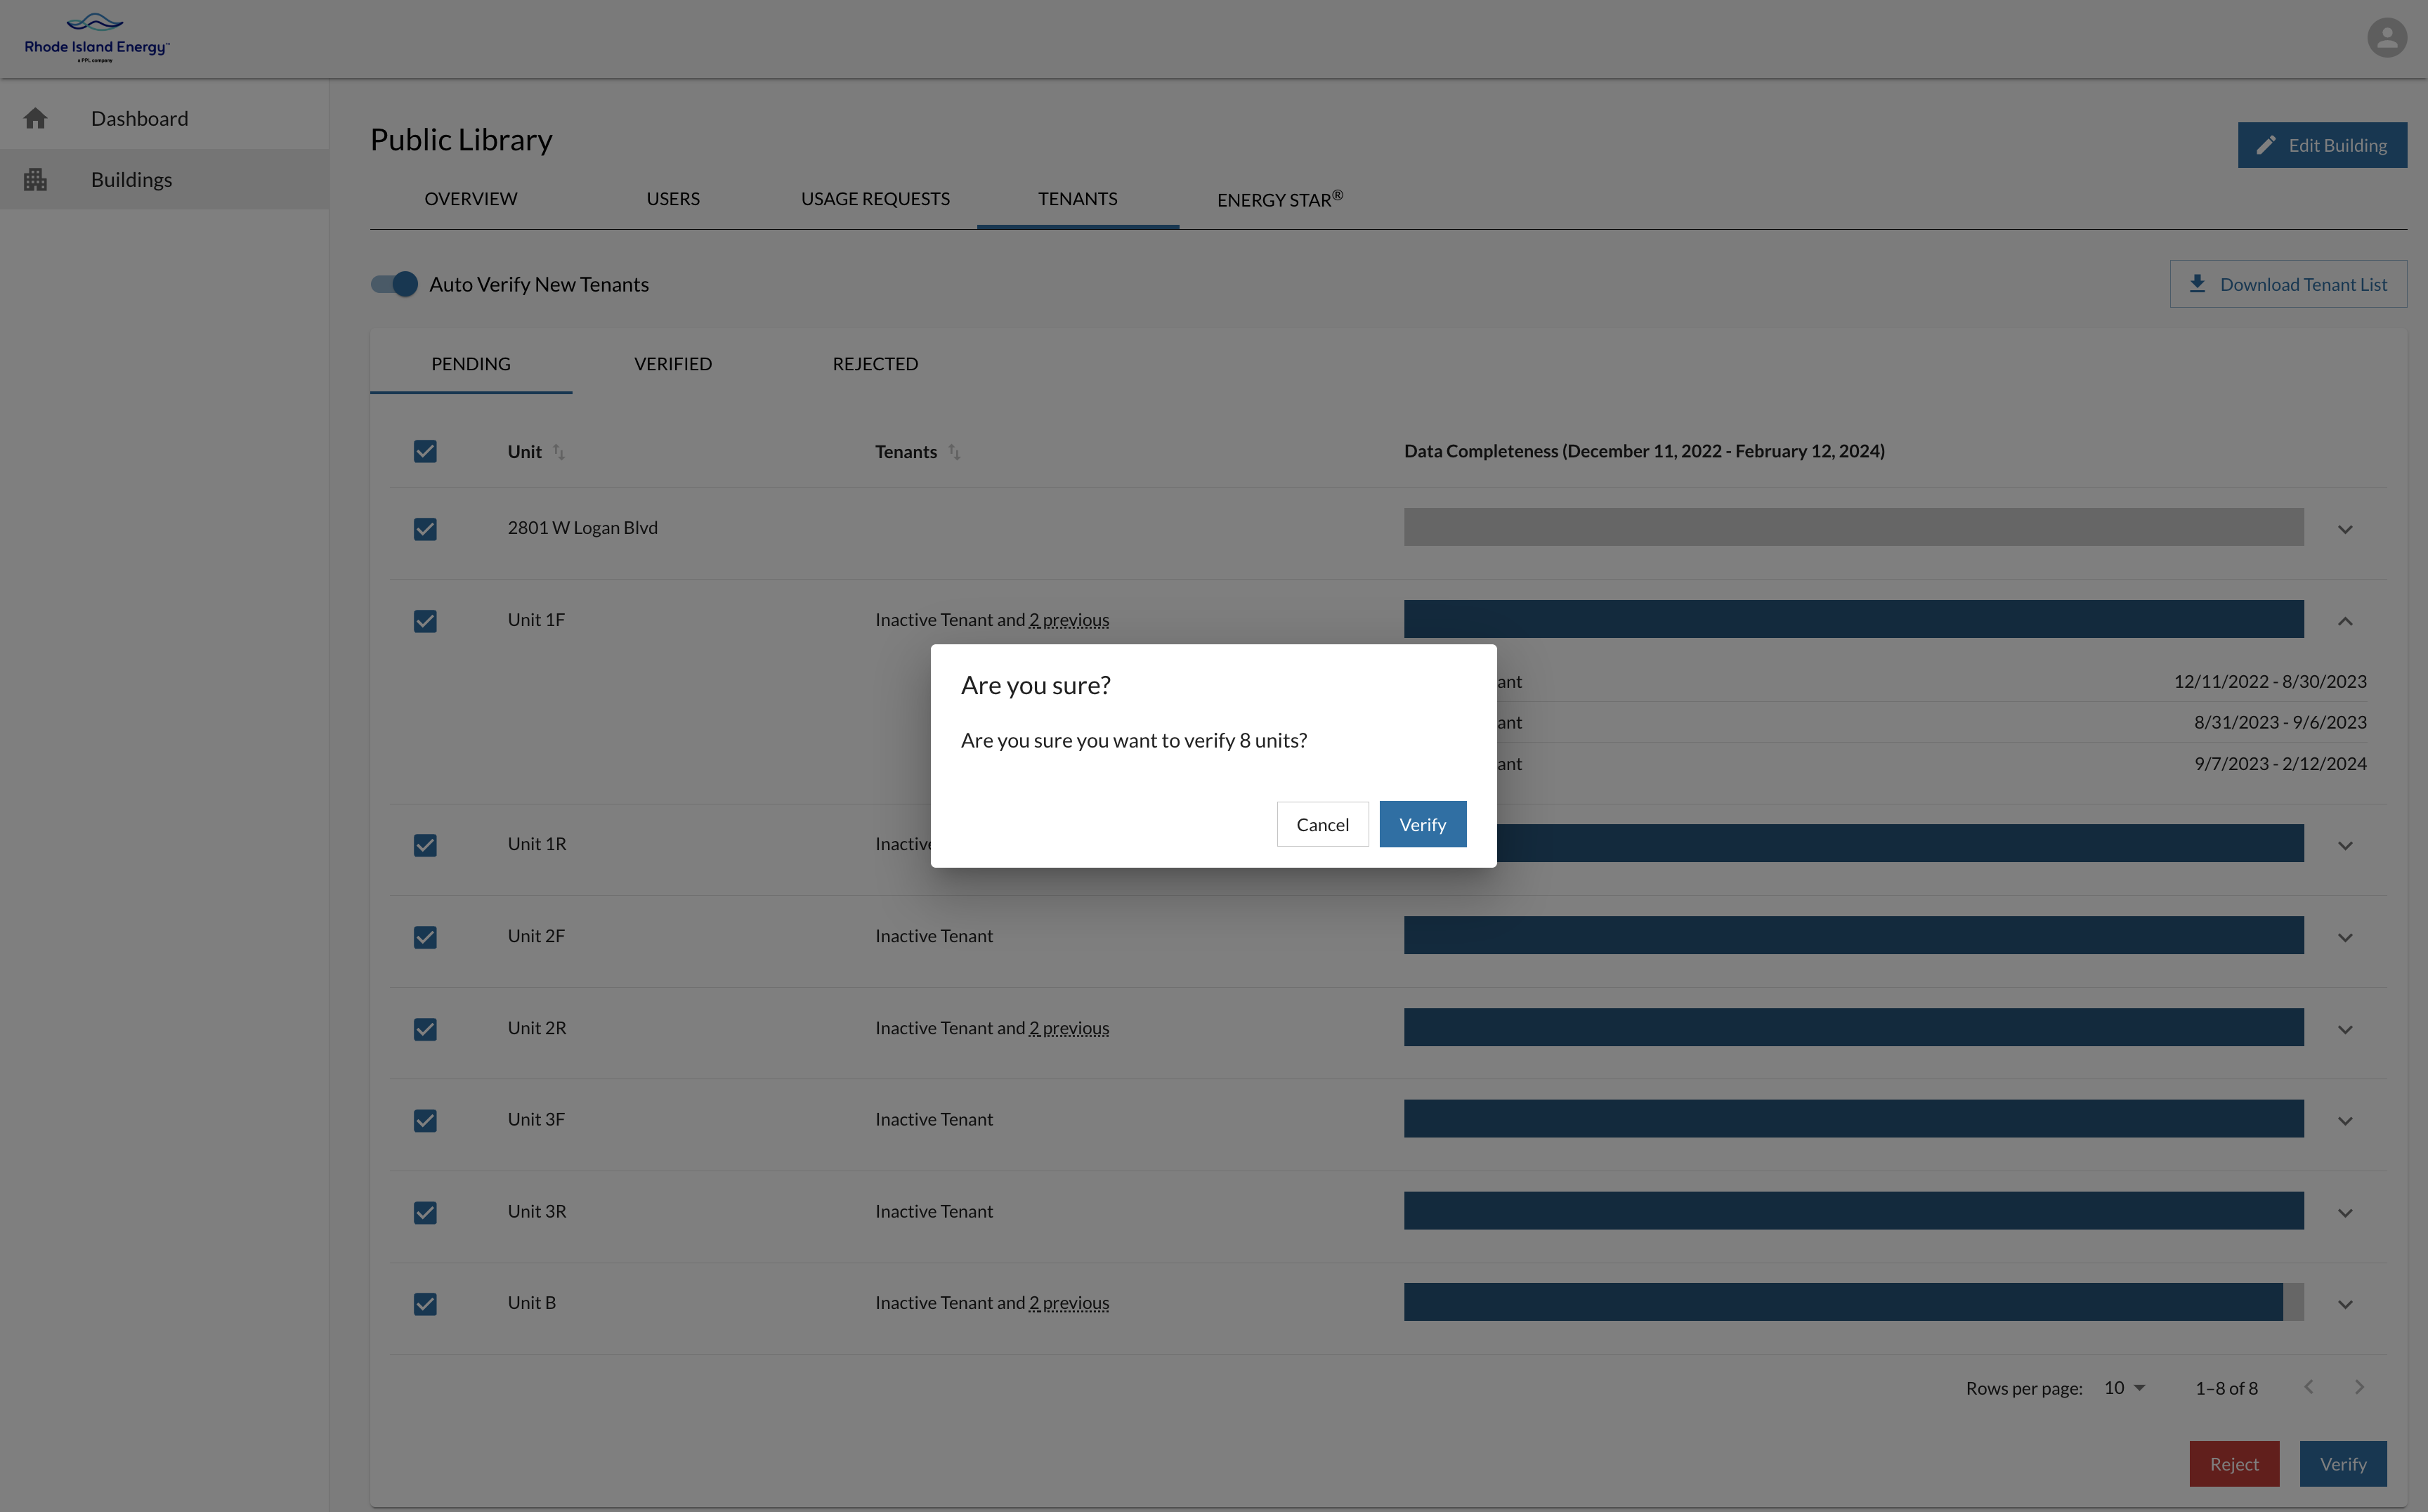
- Click the Verify button.
- A pop-up will appear asking if you are sure you would like to verify the tenants. Click the Verify button.
To reject tenants:
- Click on the checkbox at the top of the tenant list or click on each individual checkbox.
- Click the Reject button.
- A pop-up will appear asking if you are sure you would like to reject the tenants. Click the Reject button.
4.2.5 ENERGY STAR® Portfolio Manager®
The ENERGY STAR tab allows Building Owners to manage their connection with their ENERGY STAR Portfolio Manager account.
For information on connecting your building to your ENERGY STAR account, please reference the ENERGY STAR Portfolio Manager Connection Guide.
4.3 Viewing and Downloading Usage Data
Once a usage request has been created and tenants have been verified, the BDP will aggregate usage data for all verified tenants associated with all addresses that have been added to the building profile.
For buildings with open-ended usage requests, new usage data will be made available on the first of the new month. To ensure that the most accurate data is displayed, usage data for a given month will not be displayed until two full months after the billing period.
To view a building’s usage data:
- Navigate to the Overview page for the building whose data you would like to view.
- You will see a graphical representation of the usage data with the option to view electric data in year-over-year fashion or over the full range of data available.
- Under both the ‘Year-Over-Year’ and ‘Full Range’ options, you can click the date range found on the upper-right of the graphic and change the data’s range.
Please Note: On any variation of the usage graph, you may rollover each month to view a pop-up displaying the usage amount.
To download a building’s usage data:
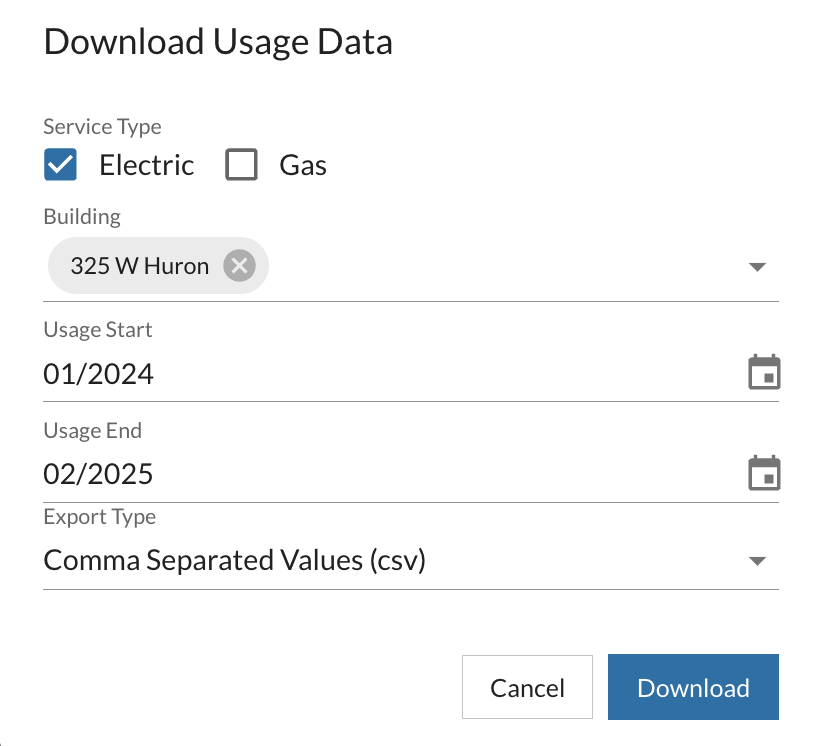
- From the Buildings page on the left-side navigation menu, click on the desired building. Navigate to the Overview page for the building whose data you would like to view.
- Press the Download Usage Data button found on the lower-left hand side of the usage graph.
- You will then be taken to the Download Usage Data pop-up, where you can choose the usage type, building (by default this will be for the building whose page you are on, but you may change the building from here), start and end dates, and export type that you would like (CSV, Green Button Data, ENERGY STAR-compatible format (.xlsx)). For information on how to use the ENERGY STAR format, please visit https://energystar.my.site.com/PortfolioManager/s/article/How-do-I-use-the-simple-spreadsheet-upload.
At any point within use of the tool, the footer will provide you access to the application’s legal information, ENERGY STAR Portfolio Manager, and support for BDP, including user guides and a link to contact support.
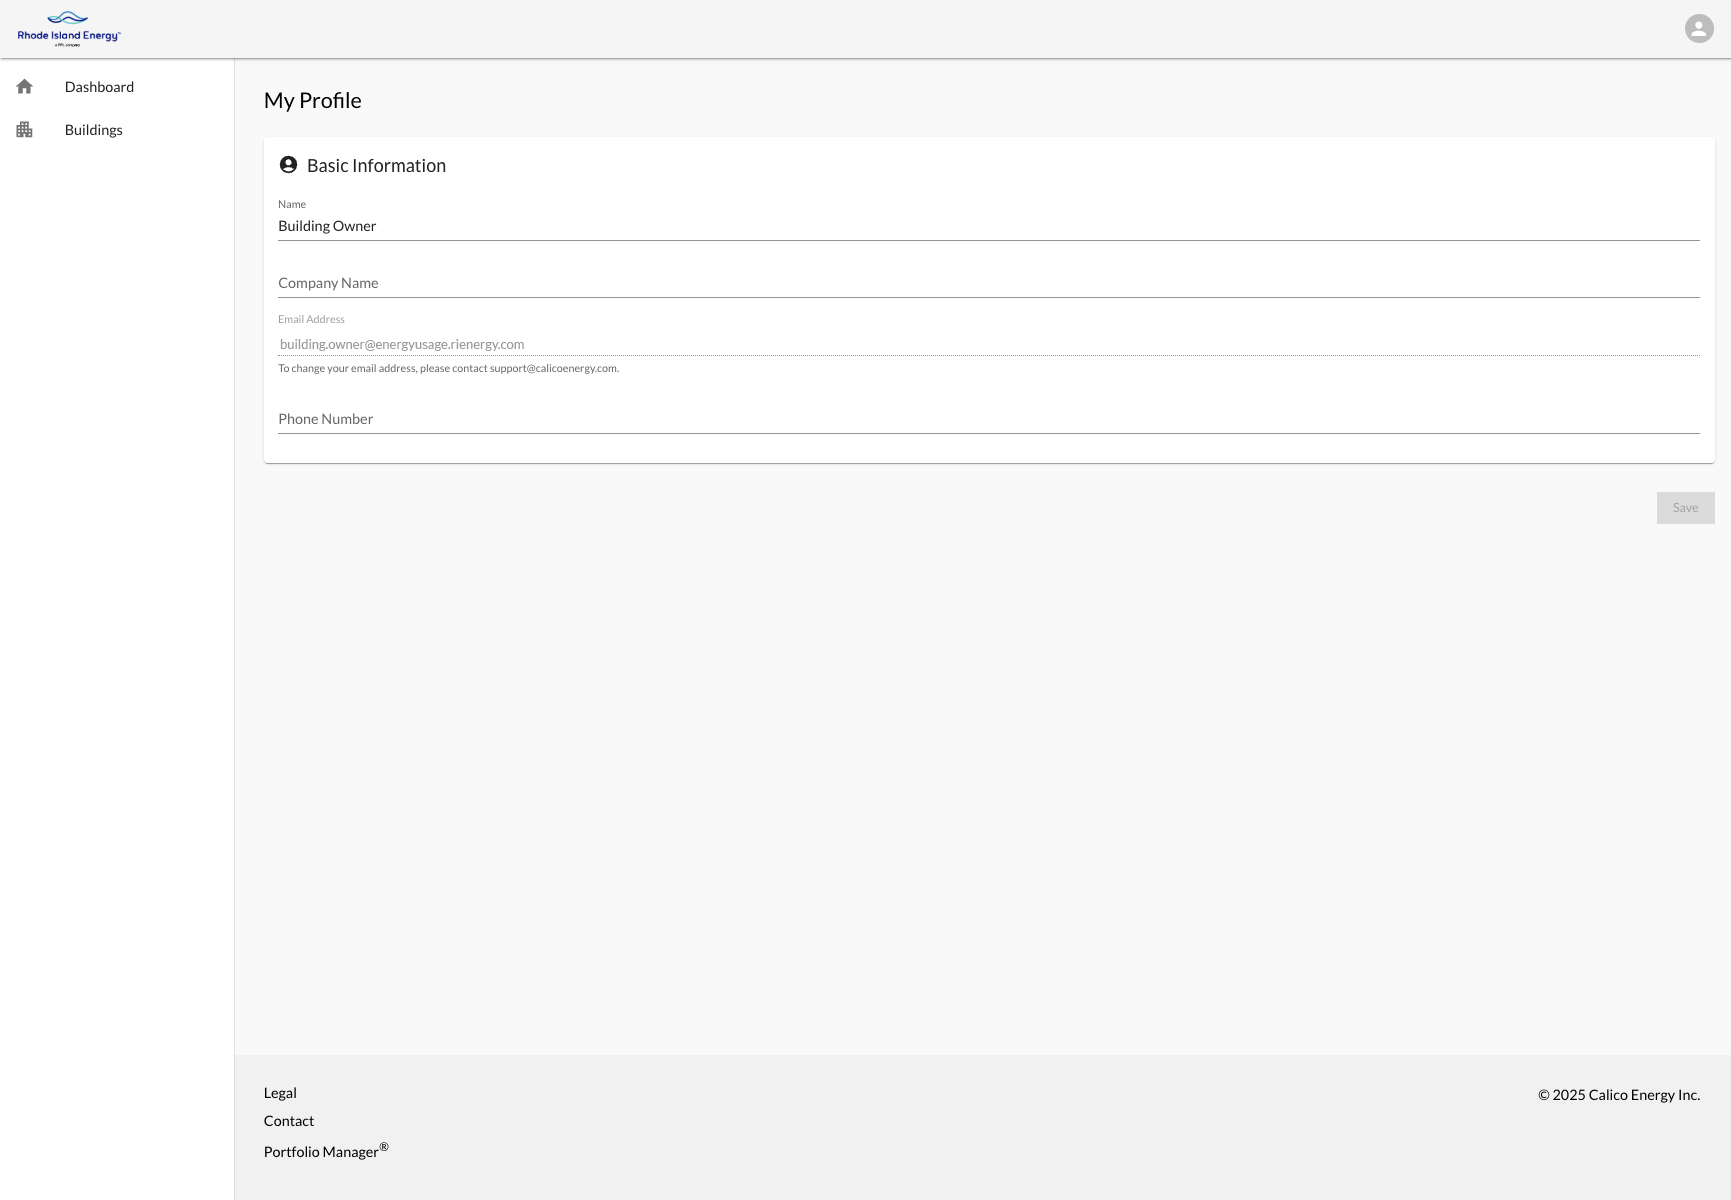

As a Building Owner, you have access to edit some information on your user profile.
- To navigate to your user profile, click on your initials, found on the top-right of the tool.
- To view your user profile, click Profile.
- You will be brought to the My Profile page, where you can update your name or phone number. To change your e-mail address, please contact the Building Data Portal Team.
- Once necessary updates are made, click the Save button to save changes.

As a Building Owner, you can reset your password when needed:
- Navigate to https://www.energyusage.rienergy.com. Click Login.
- Click the Forgot Password link.
- On the resulting page, please enter the e-mail address associated with your BDP account and click the Continue button. You will receive an email with instructions on how to reset your password. If you do not receive an e-mail with instructions on how to reset your password within 30 minutes, please contact the Building Data Portal Team at support@energyusage.rienergy.com.
To log out of BDP:
- Click on your initials, found on the top-right of the tool.
- To end your session in the tool, click the Logout button.